> ## Documentation Index
> Fetch the complete documentation index at: https://docs.ntop.com/llms.txt
> Use this file to discover all available pages before exploring further.
# How do I use the Ramp block?
## Question:
How does the **Ramp** block work?
## Answer:
The **Ramp** block lets you gradually change a value based on the Scalar field. **Ramp** functions can be applied to several types of fields. Another way to think of a **Ramp** is a gradual transition, like walking up a ramp. It takes you from one level to another incrementally.
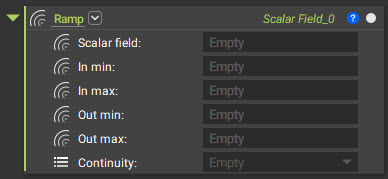
* **Scalar field:** The field driving the **Ramp**.
* There are many options for this input, which is where the power of this block shines. Some examples are (but not limited to):
* [Implicit Bodies](#h-01hn4cg5f11z08n4e6p1rsyeh5)
* [Point and Axis](#h-01hn4cgmqjfev4jwr9berfrtjd)
* [Simulation Results: Von Mises Stress, Displacement Results.](#h-01hn4dh59a8b9s4nfaw8a2yq0d)
* [Imported Point Maps converted into Scalar fields (using **Field from Point Map**).](#01hn4dhamft8rhdqcsxtwmjg10)
* \*\*In min/In max:\*\*The boundary where the **Ramp** begins (In min) and ends (In max). These values are in relation to the Scalar Field (with 0 mm usually being the neutral edge of the field).
* \*\*Out min/Out max:\*\*The **Ramp** output values. Out min is the starting value at the In min, and Out max is the value reached at the In max. They are the new values as a function of the Scalar field.
* The values ramp between the **In min** and **In max** values. Before **In min**, the value stays constant at the **Out min** value, and after **In max**, the value stays constant at the **Out max** value.
*Note: When defining these values, make sure to include units.*
* **Continuity:** Represents how the values will ramp from In min to In max.
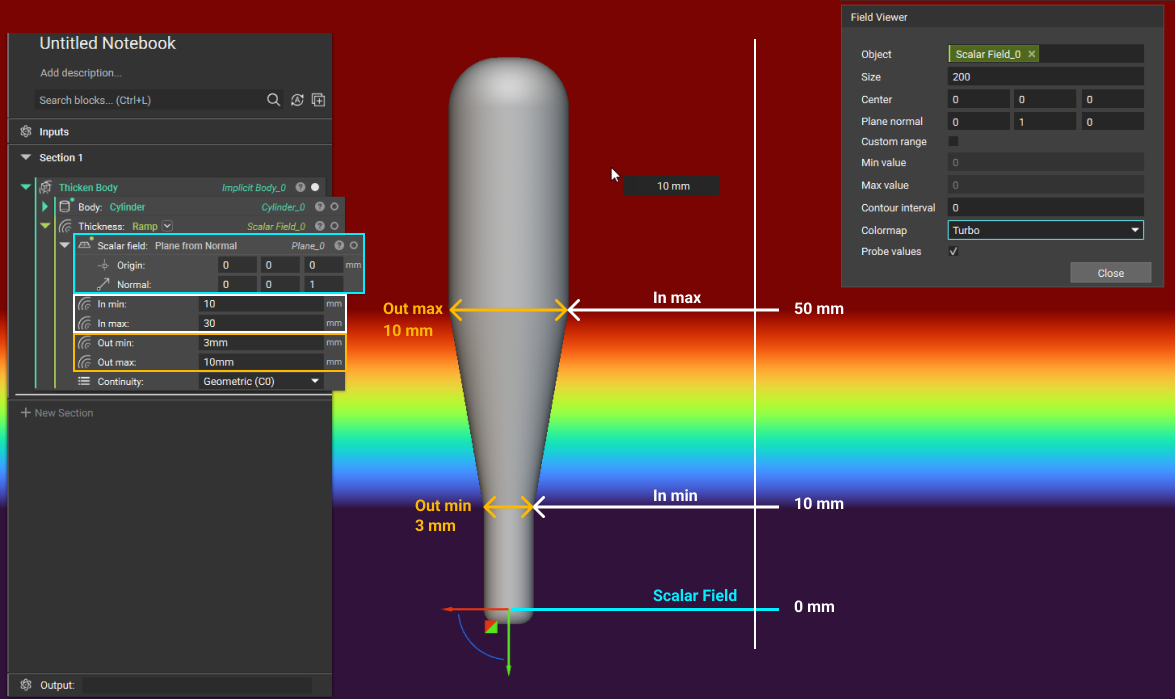
The image below shows a Field View ([How to use the Field Viewer](/help-articles/knowledge-base/user-interface/how-to-use-the-field-viewer)) of a **Ramp** block used in a **Thicken Body** block. The body input is a **Cylinder,** and the **Ramp** block defines the Thickness.
The **Ramp** block uses a **Plane from Normal** block as its Scalar field. When you use the Turbo colormap in the field viewer, you can see the transition of the Thickness values from *In min* to *In max*. You can also see how the values are constant when it isn't between the *In min* and *In max* values.
*Tip: Use the Probe values toggle to see the values in the field by hovering over the field.*
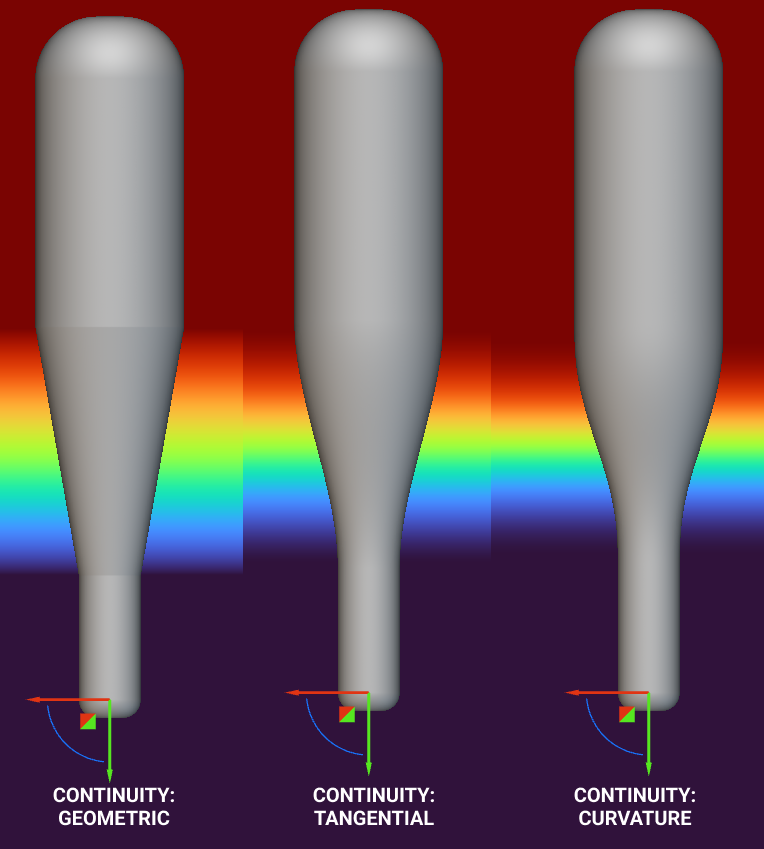
The image below shows the different *Continuity* options. Using the Field Viewer with a Turbo colormap, you can see how the transitions differ with each option.
When you use an Implicit body for the Scalar field, a value of 0 refers to the body's outline. Positive values are outside of the body, and negative values are within it.
*Tip: You can enter a value in the Contour interval of the Field viewer to accurately see where the In Min and In Max are located*
## **Example 1: Point and Axis**
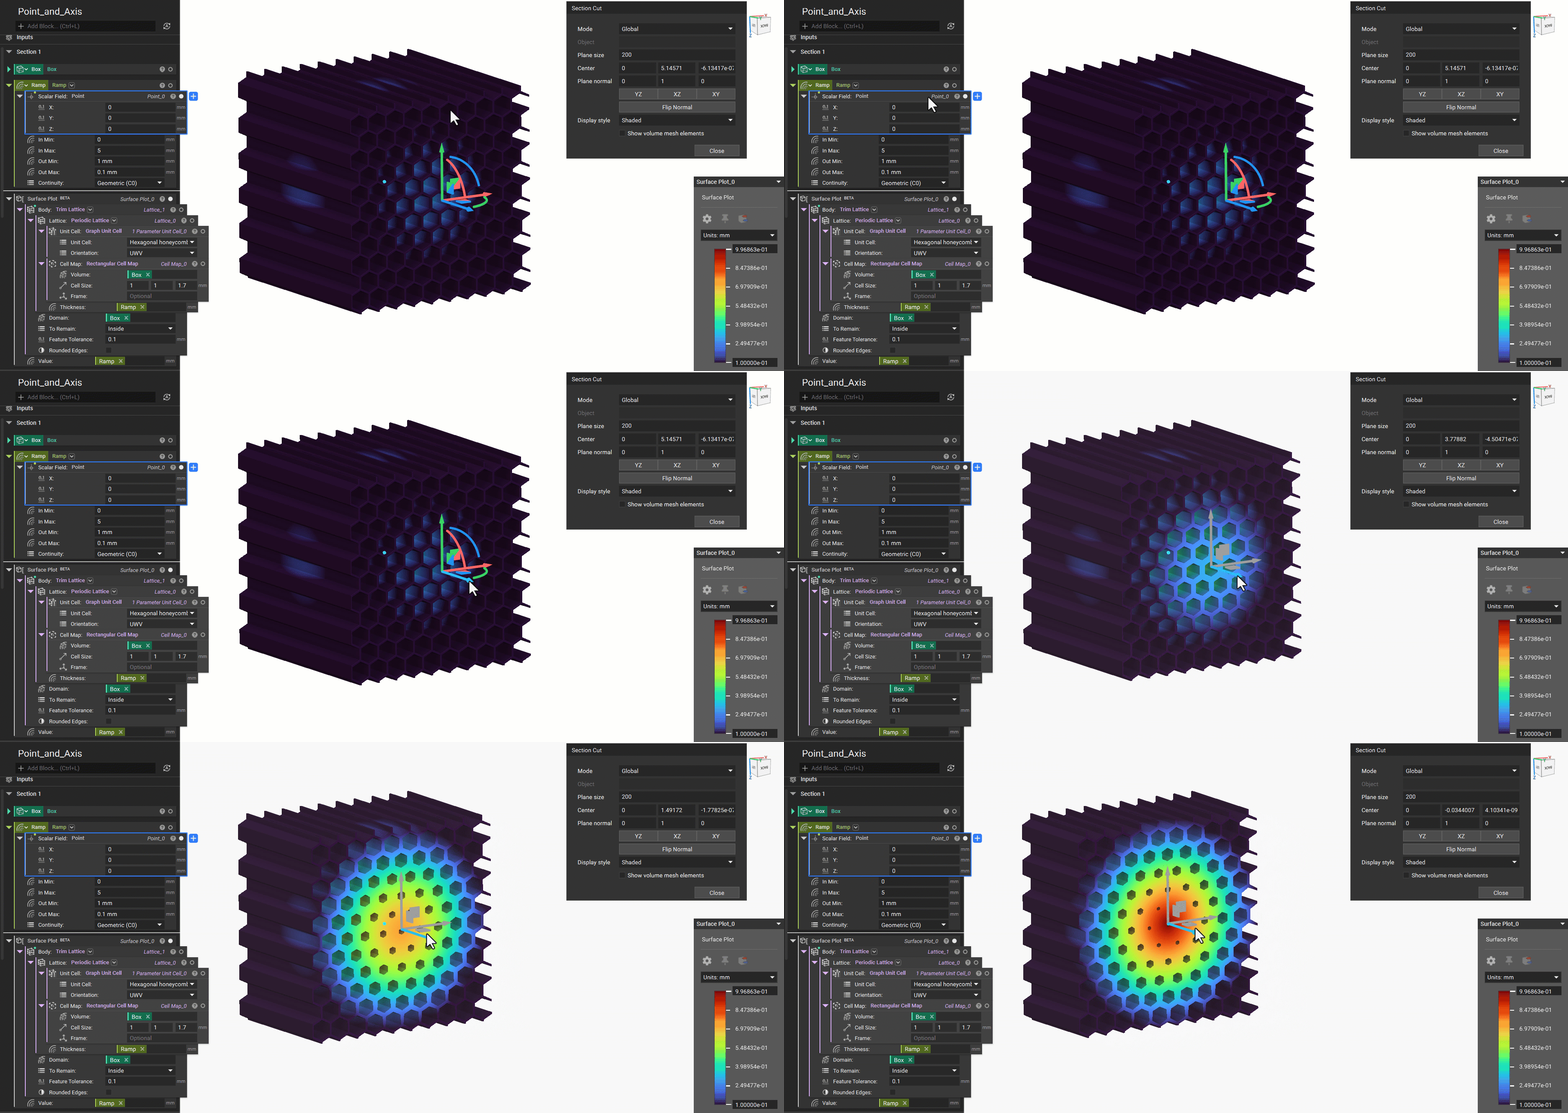
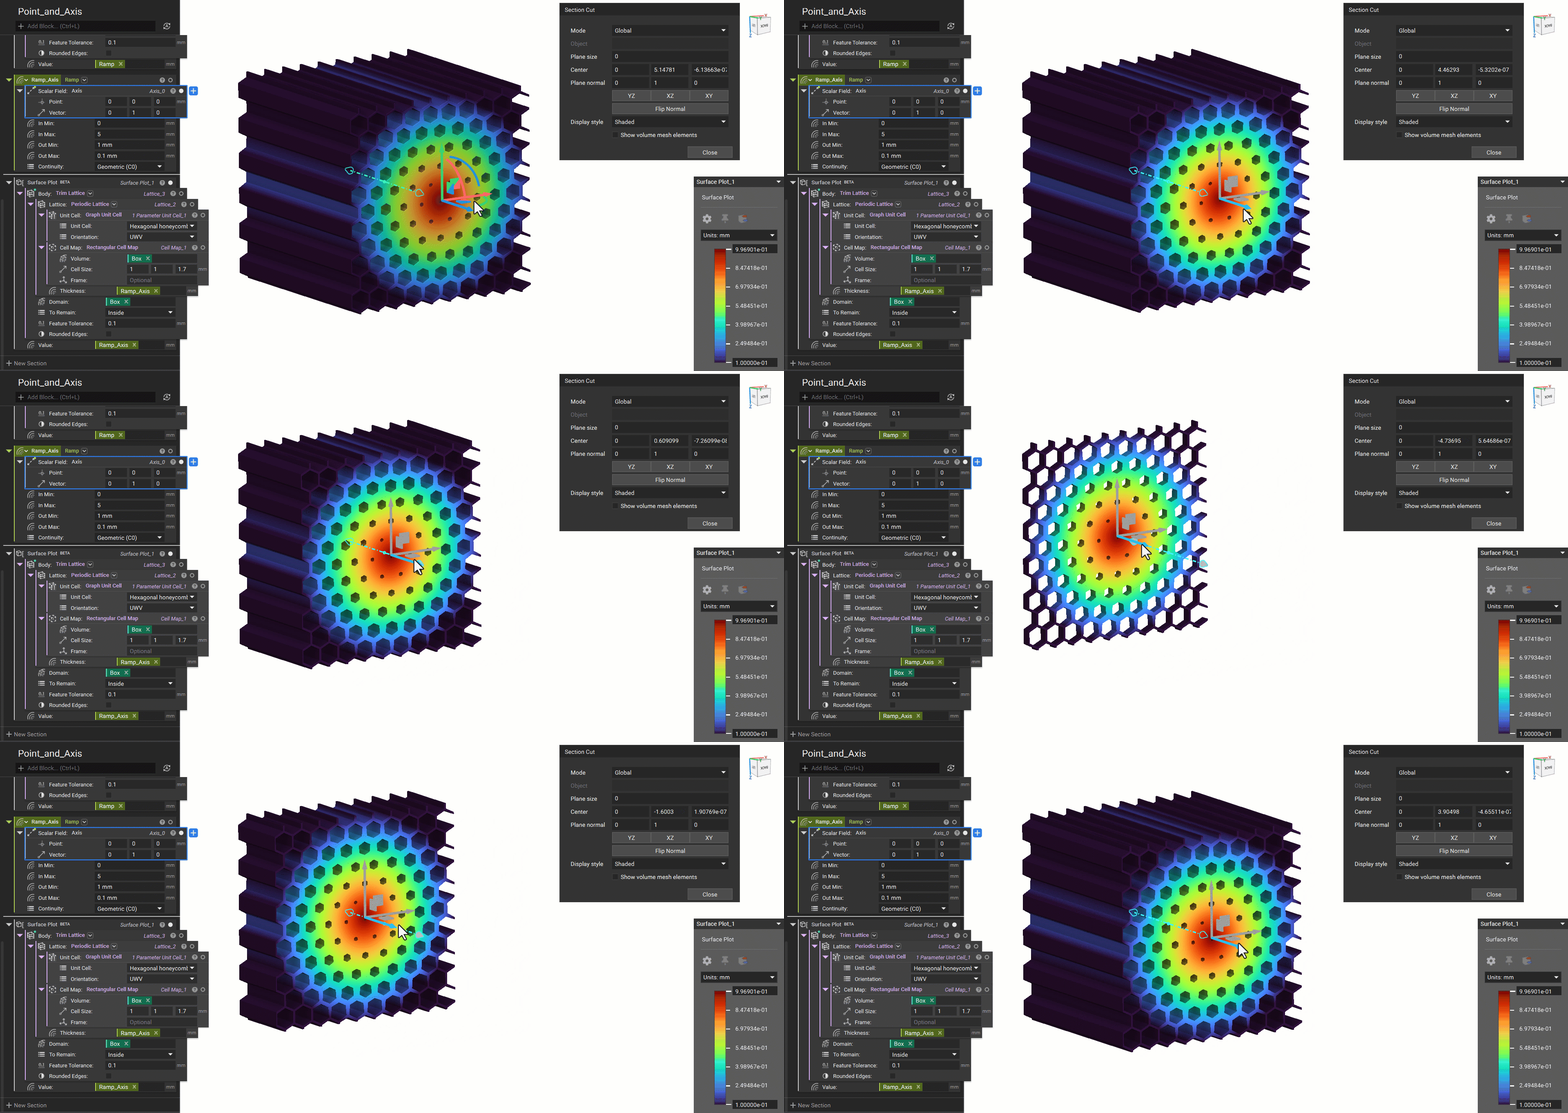
In this example, we will thicken a lattice with a **Point** and **Axis** as scalar field inputs. We can see from the Field Viewer that the **Point** creates spherical contours, and the **Axis** creates cylindrical contours.
We can use the **Surface Plot** to display the thickness of the lattice as a shaded view over it. We can see how the field varies using a point and an axis.
### Point:
### Axis:
[Example File](https://files.learn.ntop/Support%20Article%20Example%20Files/Knowledge%20Base/Implicit%20Modeling/ramp_point_axis.ntop)
## **Example 2: Point Map or Field**
In this example, we will convert a **Point Map** into a Field with the **Field from Point Map** ([How to use simulation results to create a Point Map or Field](/help-articles/knowledge-base/structures/how-to-use-simulation-results-to-create-a-point-map-or-field)) block. The Point Map was obtained from a **Static Analysis** to drive the thickness of a bike seat to increase reinforcement in those regions and keep the other regions light.
The image below shows an example of using the Ramp block to drive the thickness and point spacing input.
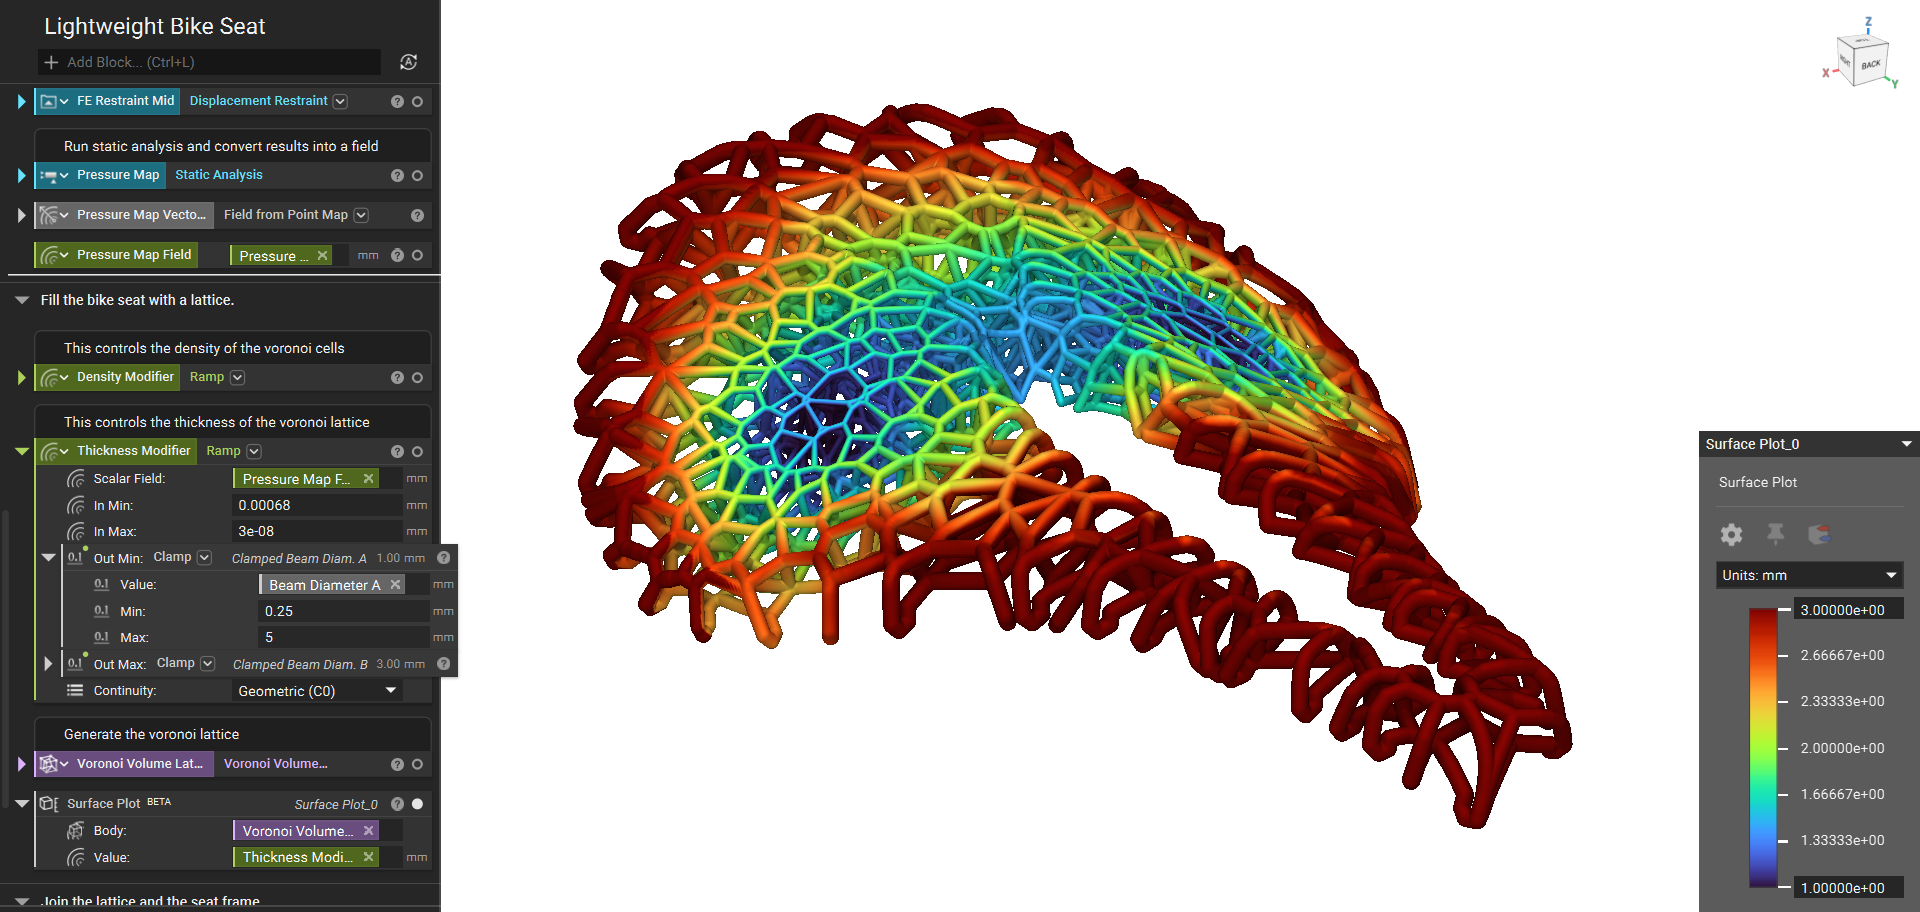
Home Screen Example - Bike Seat
## **Example 3: Combination of Fields**
You can use the **Field from Point Map** block to create fields from imported point maps ([How to use simulation results to create a Point Map or Field](/help-articles/knowledge-base/structures/how-to-use-simulation-results-to-create-a-point-map-or-field)). You can also use Math blocks in this input, such as Abs, Mod or Add, Subtract, and Boolean operations.
## Download the Example File:
* [Example File](https://files.learn.ntop.com/Support%20Article%20Example%20Files/Knowledge%20Base/Implicit%20Modeling/ramp%20block%20examples.7z)
## Keywords:
*error ramps tutorial ramp modifier surface field color question max min out how-to units in distance surface plot plot*