> ## Documentation Index
> Fetch the complete documentation index at: https://docs.ntop.com/llms.txt
> Use this file to discover all available pages before exploring further.
# Advanced Features: Mounting Features
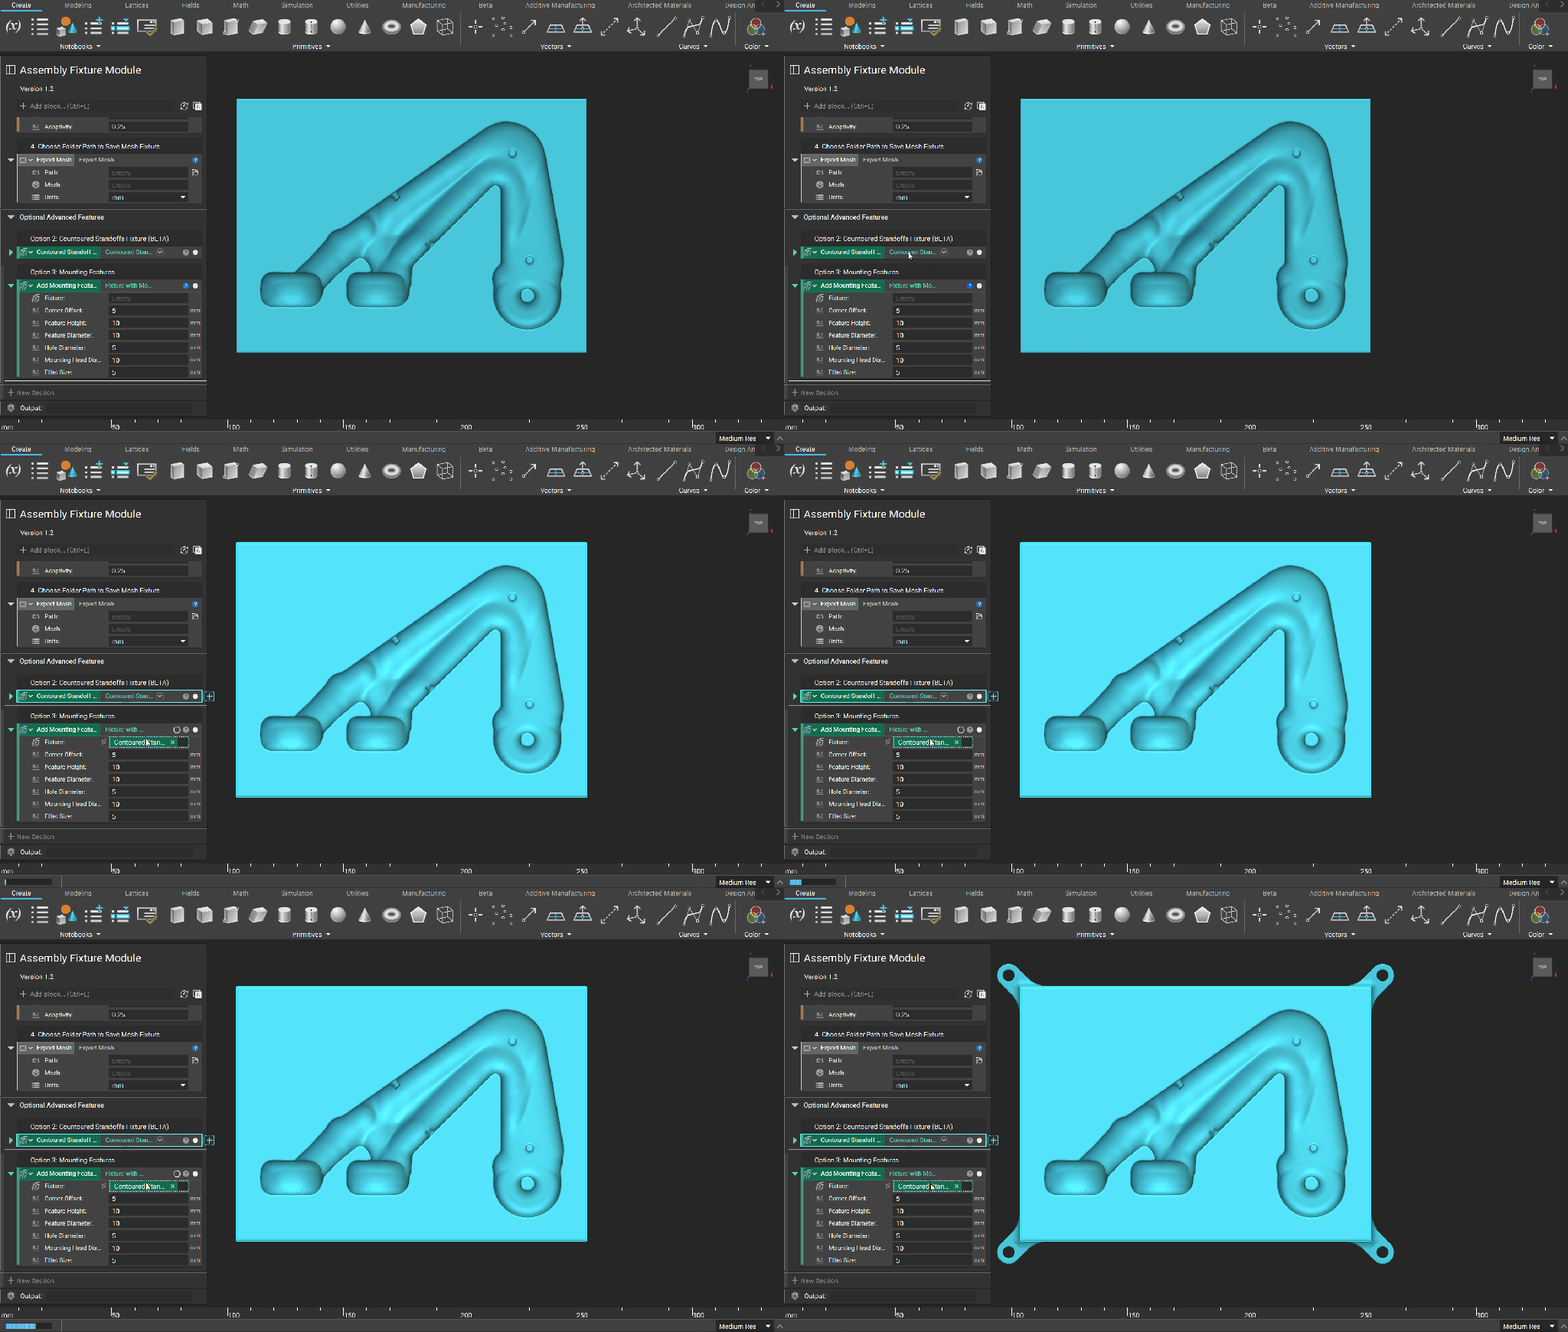
To add mounting features to your fixture, drag either\*\*'Default Fixture'\*\* or **'Contoured Standoffs Fixture'** into the *Fixture*input of the **Add Mounting Features** Block.
 ## Fixture with Mounting Features Inputs
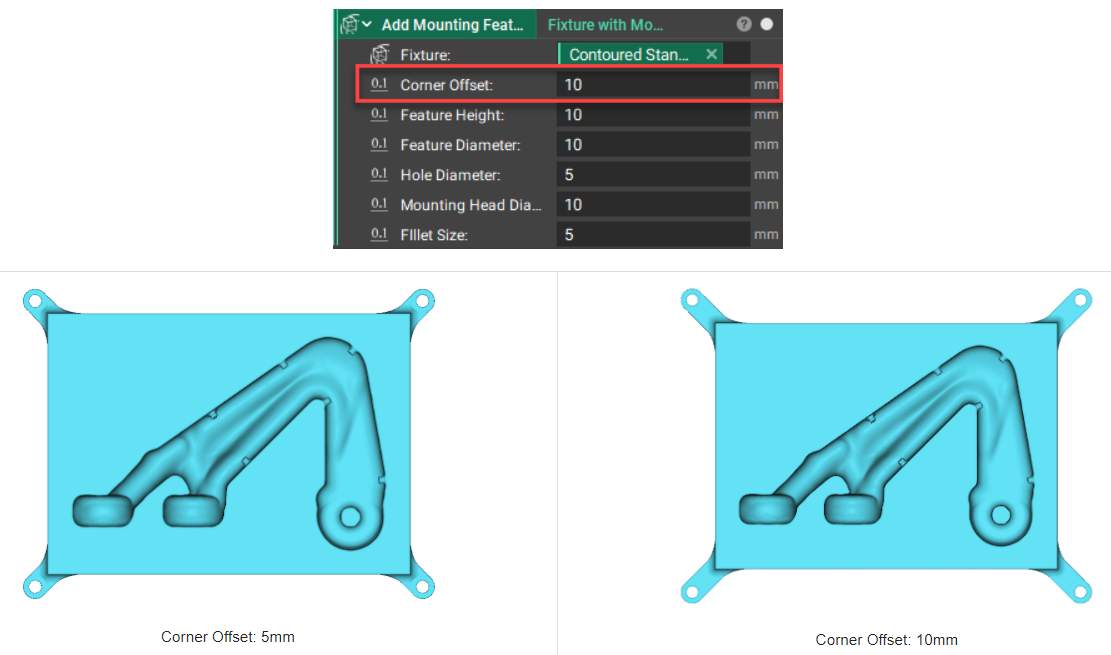
The corner offset is the distance from the mold the mounting features (center of hole) will be placed.
## Fixture with Mounting Features Inputs
The corner offset is the distance from the mold the mounting features (center of hole) will be placed.
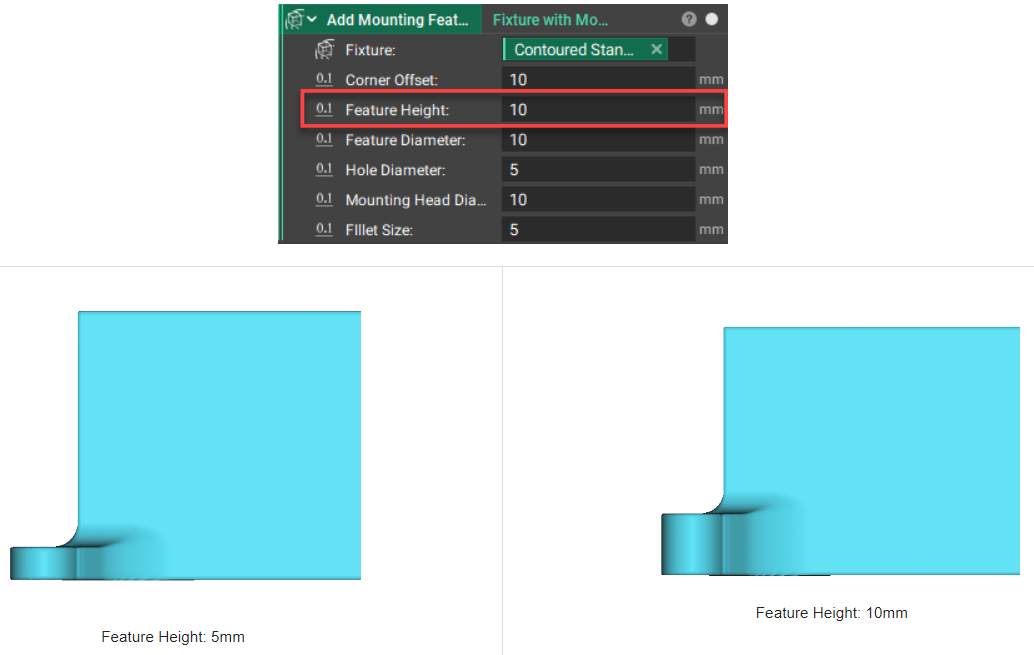
 The thickness of the flanges extending from the mold.
 The diameter input here is the width of the flange. This is also the outer diameter of the end of the flange.
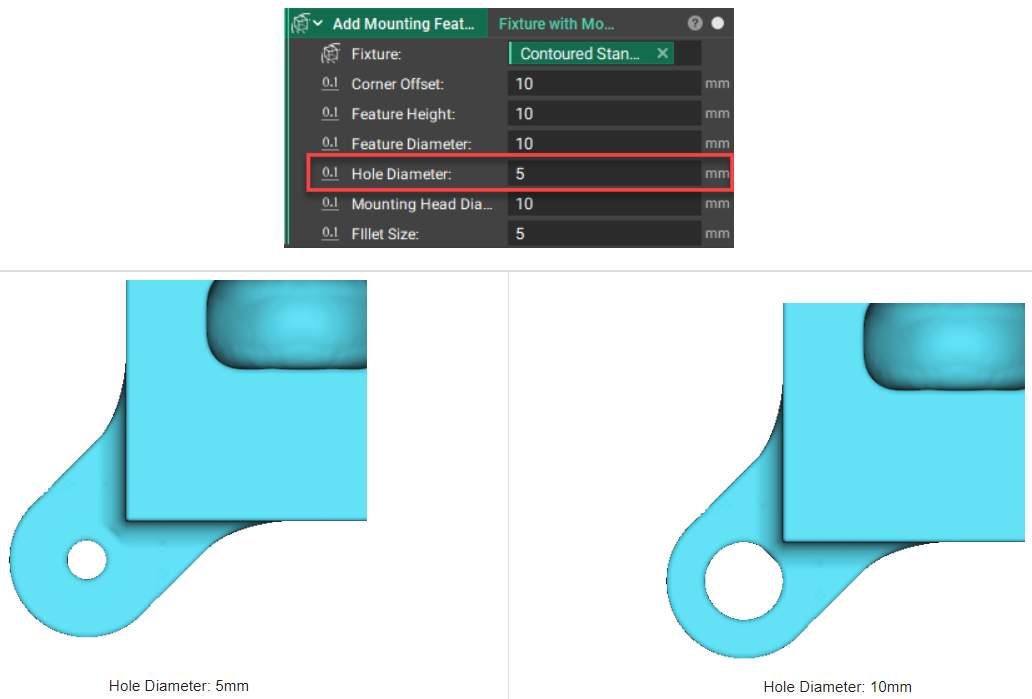
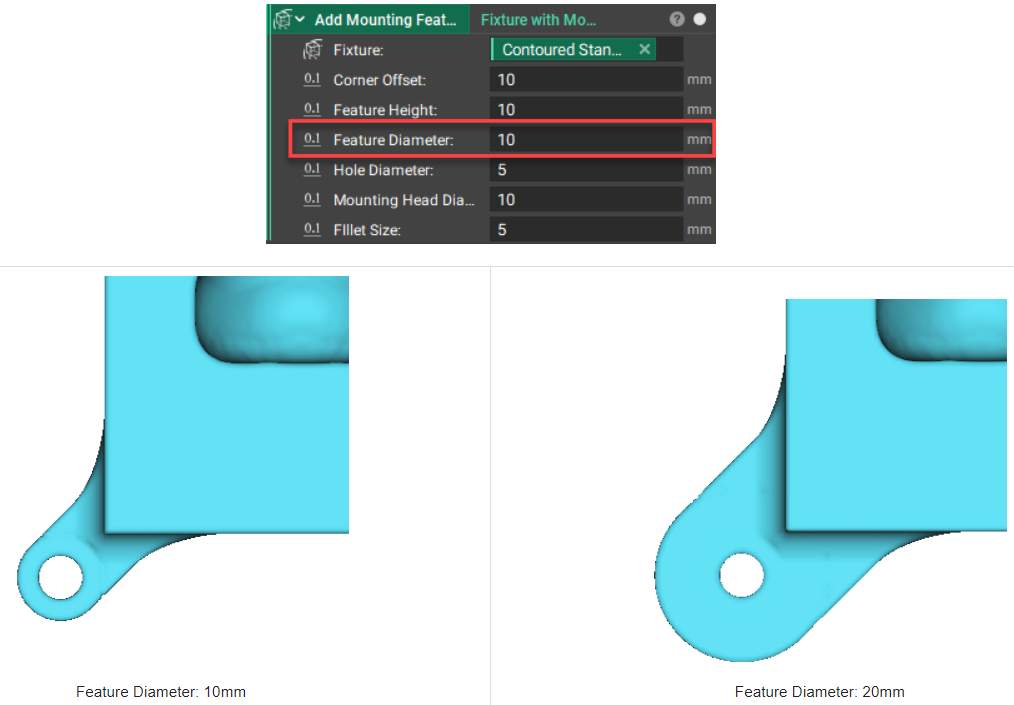 The hole diameter is the hole's diameter for taping or bolting.
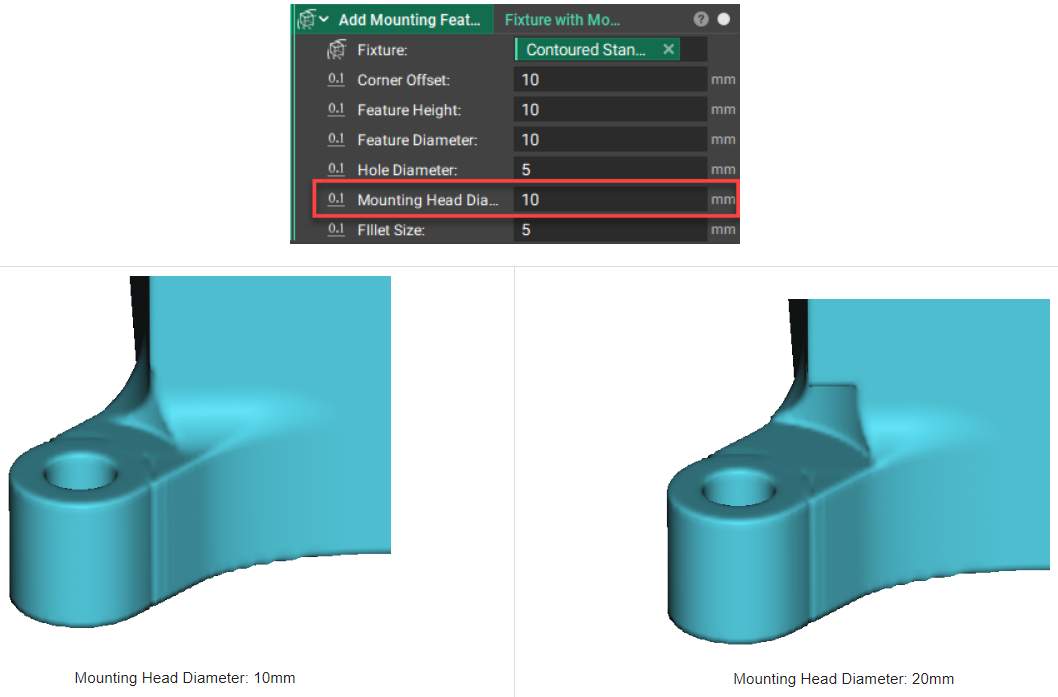
 The Mounting Head Diameter input will ensure the wash/bolt head will rest flat against the flange regardless of any fillets.
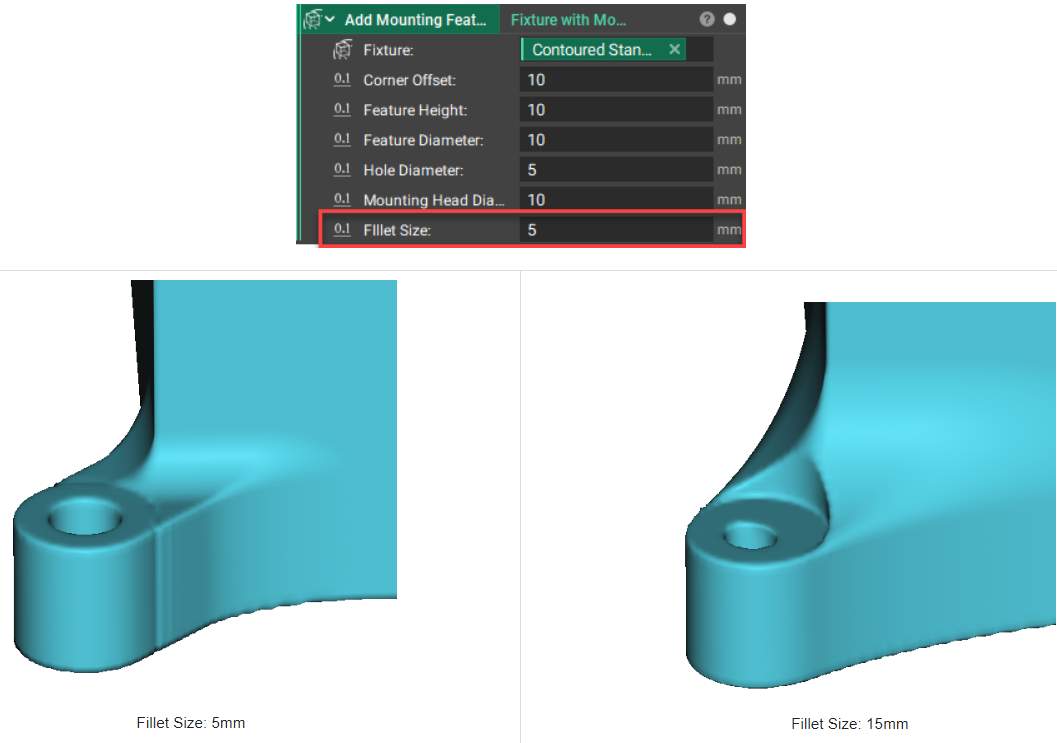
 The fillet size between the fixture and the mounting feature flanges.