> ## Documentation Index
> Fetch the complete documentation index at: https://docs.ntop.com/llms.txt
> Use this file to discover all available pages before exploring further.
# Exporting Parts
To export implicit bodies out of nTop, you must convert them into an exportable file type. We use different types of export blocks, where you assign the desired file location in the *Path*input.
In most cases, you must first convert the implicit body into a mesh. This mesh will need to go through some refining processes. To learn more about different ways to create meshes and how to refine them, check out our [102: Guide to Meshing](https://learn.ntop.com/courses/102-guide-to-meshing/) course.
Below are the steps for exporting a part as a different file type.
## Export Mesh
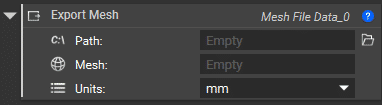
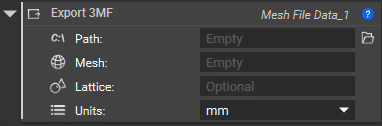
For exporting your part as either an STL, OBJ, PLY, or 3MF file, there are **Export Mesh** and **Export 3MF** blocks.

 ## Export CAD Part
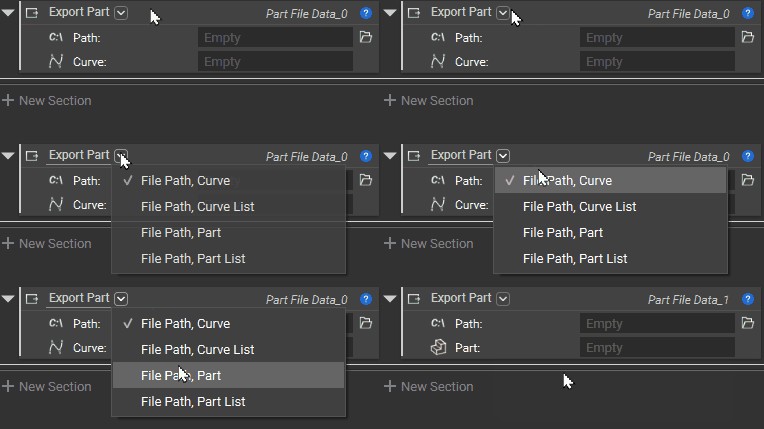
The **Export Part** block is used to export CAD parts. Implicit bodies must be converted to CAD bodies before exporting. This can be done in one of two ways:
## Export CAD Part
The **Export Part** block is used to export CAD parts. Implicit bodies must be converted to CAD bodies before exporting. This can be done in one of two ways:
 You can also convert an implicit body to CAD using the **CAD Body from Implicit Body (Beta)** block.
 **Note**: If you don't see the **CAD Body from Implicit Body (Beta)** block in nTop, you must enable Beta blocks in your settings. Review [this article](https://support.ntop.com/hc/en-us/articles/360062442113-What-are-beta-blocks) for more information on Beta blocks.
When using the **Export Part** block, the overload must be changed to match the input type.
**Note**: If you don't see the **CAD Body from Implicit Body (Beta)** block in nTop, you must enable Beta blocks in your settings. Review [this article](https://support.ntop.com/hc/en-us/articles/360062442113-What-are-beta-blocks) for more information on Beta blocks.
When using the **Export Part** block, the overload must be changed to match the input type.
 ## Export for Additive Manufacturing
Tools for slicing are all found in the *Manufacturing*tab. There are multiple slice file formats you can export. To learn more about slicing for additive manufacturing, check out our course, [250: Slicing and Print Layout](/courses/250-slicing-and-print-layout/).
## Export for Additive Manufacturing
Tools for slicing are all found in the *Manufacturing*tab. There are multiple slice file formats you can export. To learn more about slicing for additive manufacturing, check out our course, [250: Slicing and Print Layout](/courses/250-slicing-and-print-layout/).