> ## Documentation Index
> Fetch the complete documentation index at: https://docs.ntop.com/llms.txt
> Use this file to discover all available pages before exploring further.
# Preparing for Printing: Build Volume and Build Plate
Before slicing and exporting a build, you can rotate and place your parts in the optimal location for printing. Our blocks involving print preparation are under the *Additive Manufacturing* Tab.
 ## Build Volume
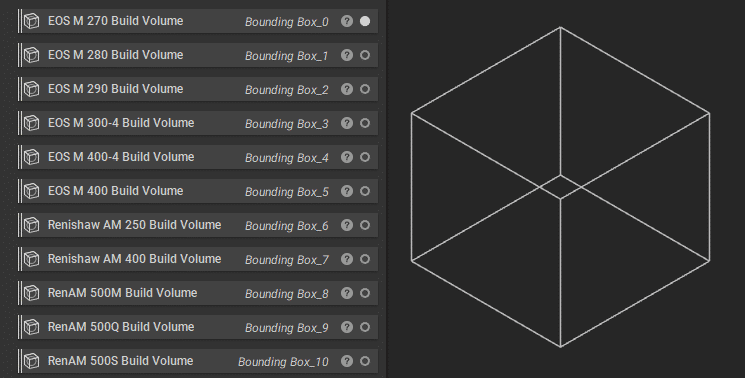
To help define where your parts will be located on the printer, you can use our selection of build volumes or create your own. Each of these build volumes is bounding boxes with the dimensions for those printers predefined. To define your build volume, you can input the dimensions in a **Bounding Box** block. If you use this often, you can create a custom block of this bounding box and save it in your My Blocks folder. Check out our [230: Intro to Automation](/courses/230-intro-to-automation/) course for more information on that process.
## Build Volume
To help define where your parts will be located on the printer, you can use our selection of build volumes or create your own. Each of these build volumes is bounding boxes with the dimensions for those printers predefined. To define your build volume, you can input the dimensions in a **Bounding Box** block. If you use this often, you can create a custom block of this bounding box and save it in your My Blocks folder. Check out our [230: Intro to Automation](/courses/230-intro-to-automation/) course for more information on that process.
 ## Build Plane
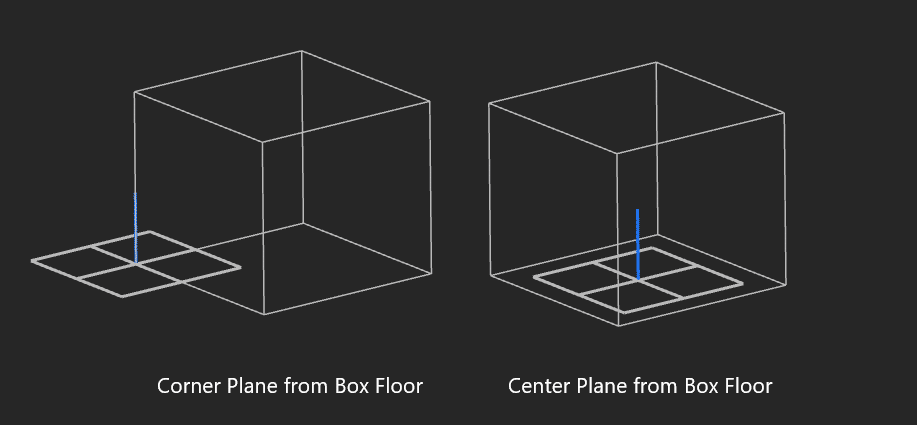
To define the build plane, you can use the**Corner Plane from Box Floor** or the **Center Plane from Box Floor**blocks using the bounding box or build volume described previously. You can then use this for ensuring your parts are located on the build plane, as many of our additive manufacturing blocks use a given build plane when orientating and placing your piece.
## Build Plane
To define the build plane, you can use the**Corner Plane from Box Floor** or the **Center Plane from Box Floor**blocks using the bounding box or build volume described previously. You can then use this for ensuring your parts are located on the build plane, as many of our additive manufacturing blocks use a given build plane when orientating and placing your piece.
 Once you have these inputs, we are ready to place parts on the build plane.