> ## Documentation Index
> Fetch the complete documentation index at: https://docs.ntop.com/llms.txt
> Use this file to discover all available pages before exploring further.
# Slicing a Body
Once you are ready to print, it is time to use the **Slice Body**, **Slice Mesh**, or **Slice Lattice Graph** block. All of these work very similarly; the only difference in inputs is that the **Slice Body** requires a *Feature Size* and *Boundary*.
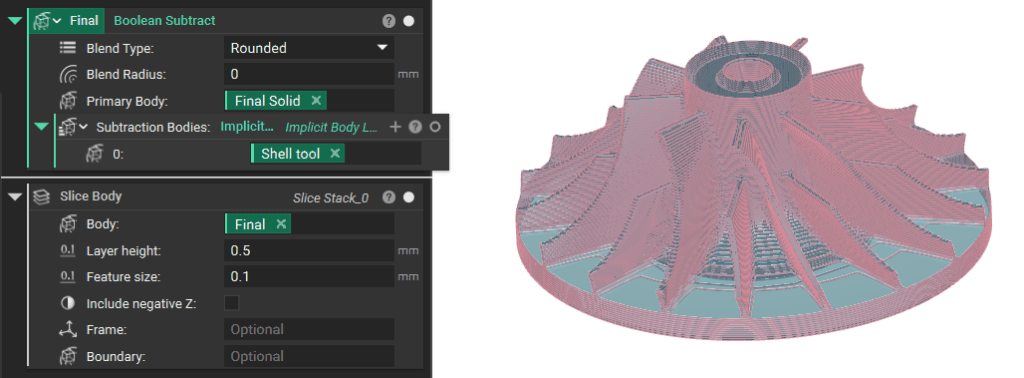
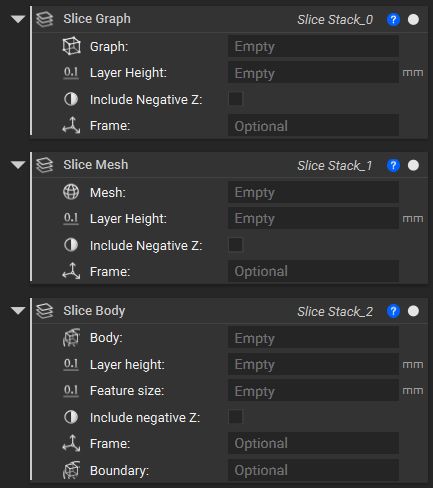 To slice an Implicit Body, Graph, or Mesh. If you would want to slice an implicit body. Drag and drop the Implicit Body in the *Body*input, which will slice with the *Layer Height* and *Feature Size* input parameters. If your body has portions below 0 in the Z direction, select “Include Negative Z.”
You can also add a *Frame* if you want to slice at an angle or a different starting location. In the *Frame* input, add a reference point to generate the slice stack using the **Frame**block.
To slice an Implicit Body, Graph, or Mesh. If you would want to slice an implicit body. Drag and drop the Implicit Body in the *Body*input, which will slice with the *Layer Height* and *Feature Size* input parameters. If your body has portions below 0 in the Z direction, select “Include Negative Z.”
You can also add a *Frame* if you want to slice at an angle or a different starting location. In the *Frame* input, add a reference point to generate the slice stack using the **Frame**block.
 ## Black and White Image Slicing
If you need a Black-and-White Image Stack, you can create one with the **Slice Body to B\&W Image Stack** block. First, the implicit bodies on the build volume are oriented, and this list is translated to the *Implicit*input in the block.
## Black and White Image Slicing
If you need a Black-and-White Image Stack, you can create one with the **Slice Body to B\&W Image Stack** block. First, the implicit bodies on the build volume are oriented, and this list is translated to the *Implicit*input in the block.
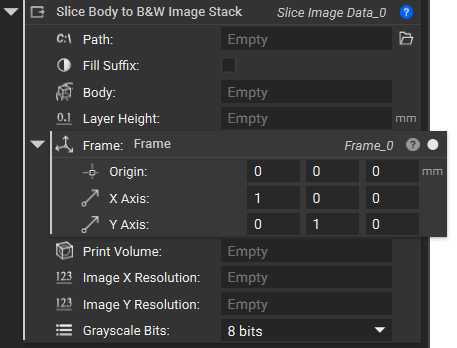 **Fill Suffix:**
* Toggled On: Names the files: “slice\_001”, where the total number of slices determines the number of 0's before the slice number.
* Toggled Off: The files are named “slice\_1”, with no 0's.
**Layer Height:** Define the spacing between the layers. You may need to check the printer settings for the appropriate range of heights.
**Frame:** This is the coordinate system for the build plate. Depending on the printer settings, it may need to be edited.
The *Resolution* is the number of pixels in the X and Y directions. This value may change depending on your printer and desired resolution. The max image resolution support is 1 billion pixels.
**Fill Suffix:**
* Toggled On: Names the files: “slice\_001”, where the total number of slices determines the number of 0's before the slice number.
* Toggled Off: The files are named “slice\_1”, with no 0's.
**Layer Height:** Define the spacing between the layers. You may need to check the printer settings for the appropriate range of heights.
**Frame:** This is the coordinate system for the build plate. Depending on the printer settings, it may need to be edited.
The *Resolution* is the number of pixels in the X and Y directions. This value may change depending on your printer and desired resolution. The max image resolution support is 1 billion pixels.
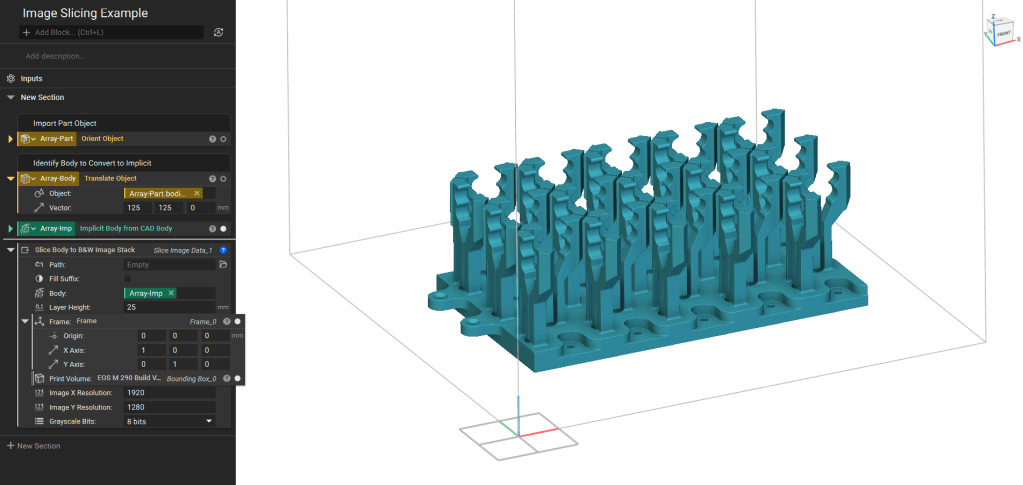 After filling in all the inputs, the block saves the resulting **\*.png** file format image stack in the zip folder defined earlier.