Overview
Note: nTop products are desktop-based software applications. They rely on a cloud server for the limited purpose of authenticating users upon login and checking for available software updates.
Table of Contents
User Dashboard
To start, you must navigate to app.ntop.com and go to your organization page, which can be found on the left-hand menu. The first tab is the Dashboard, which displays your organization’s metrics regarding Users, Teams, and Licenses.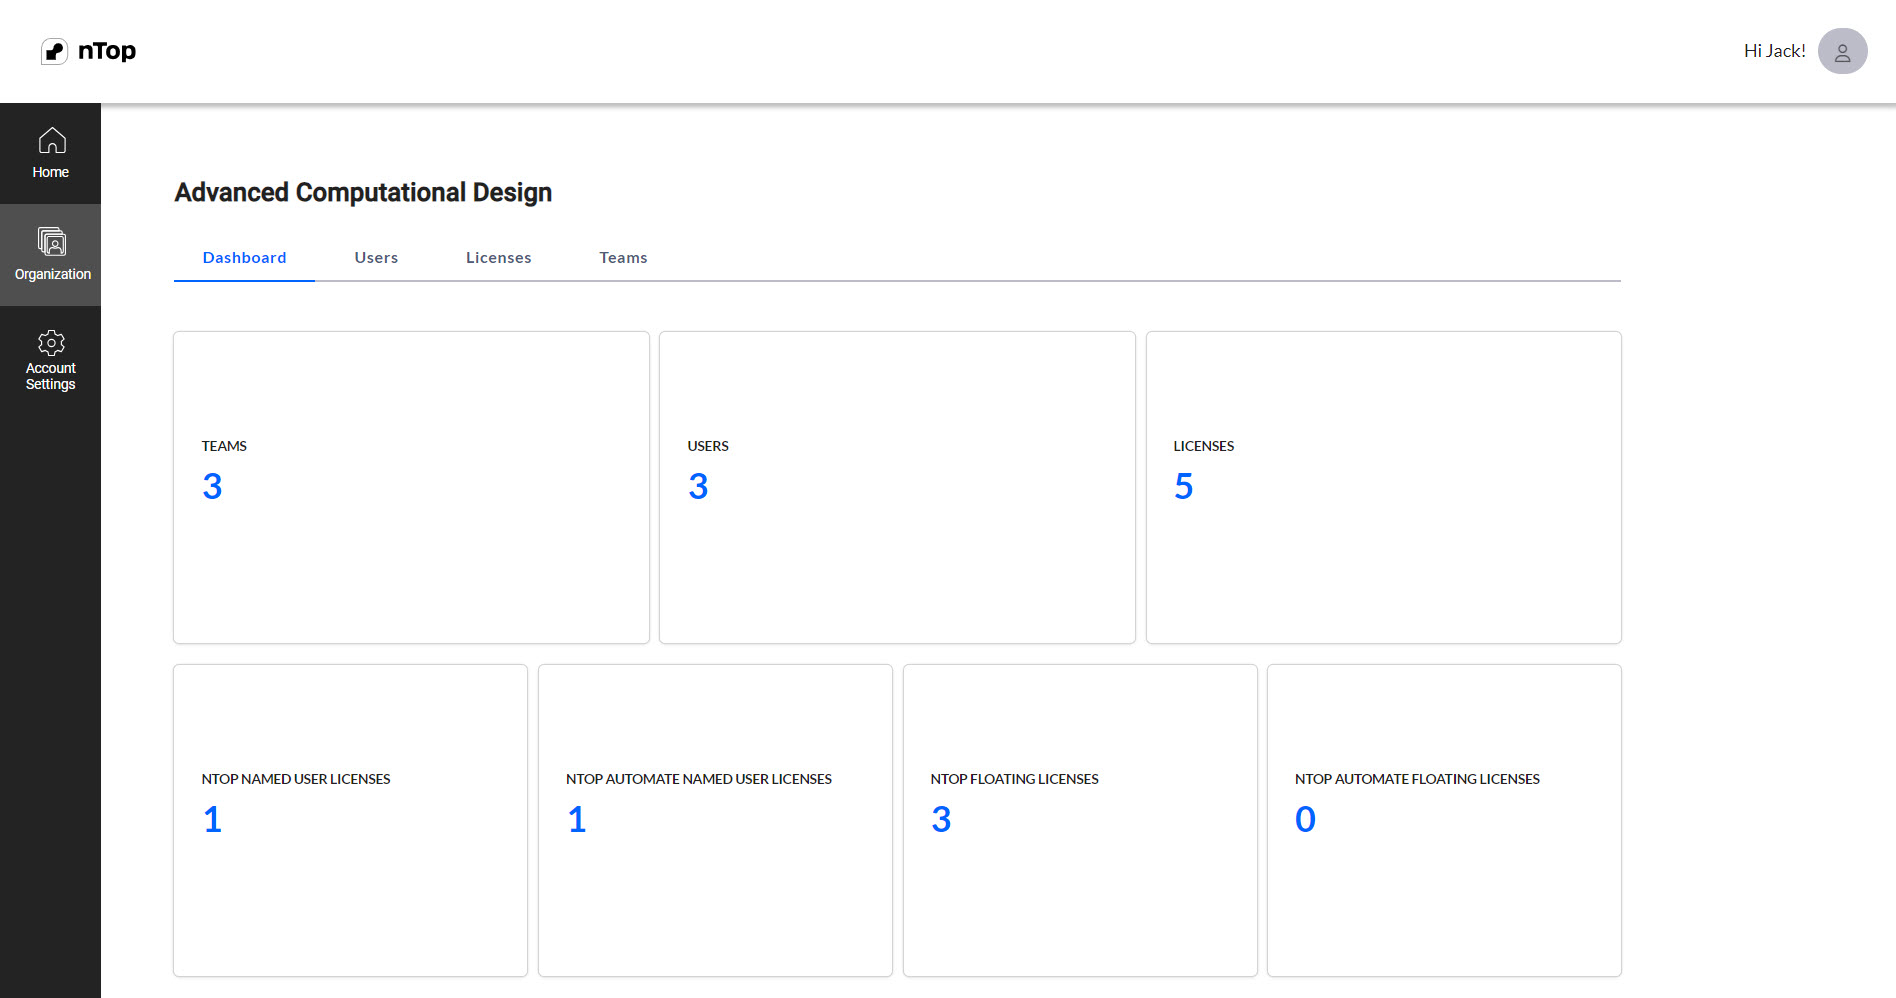
Managing Users
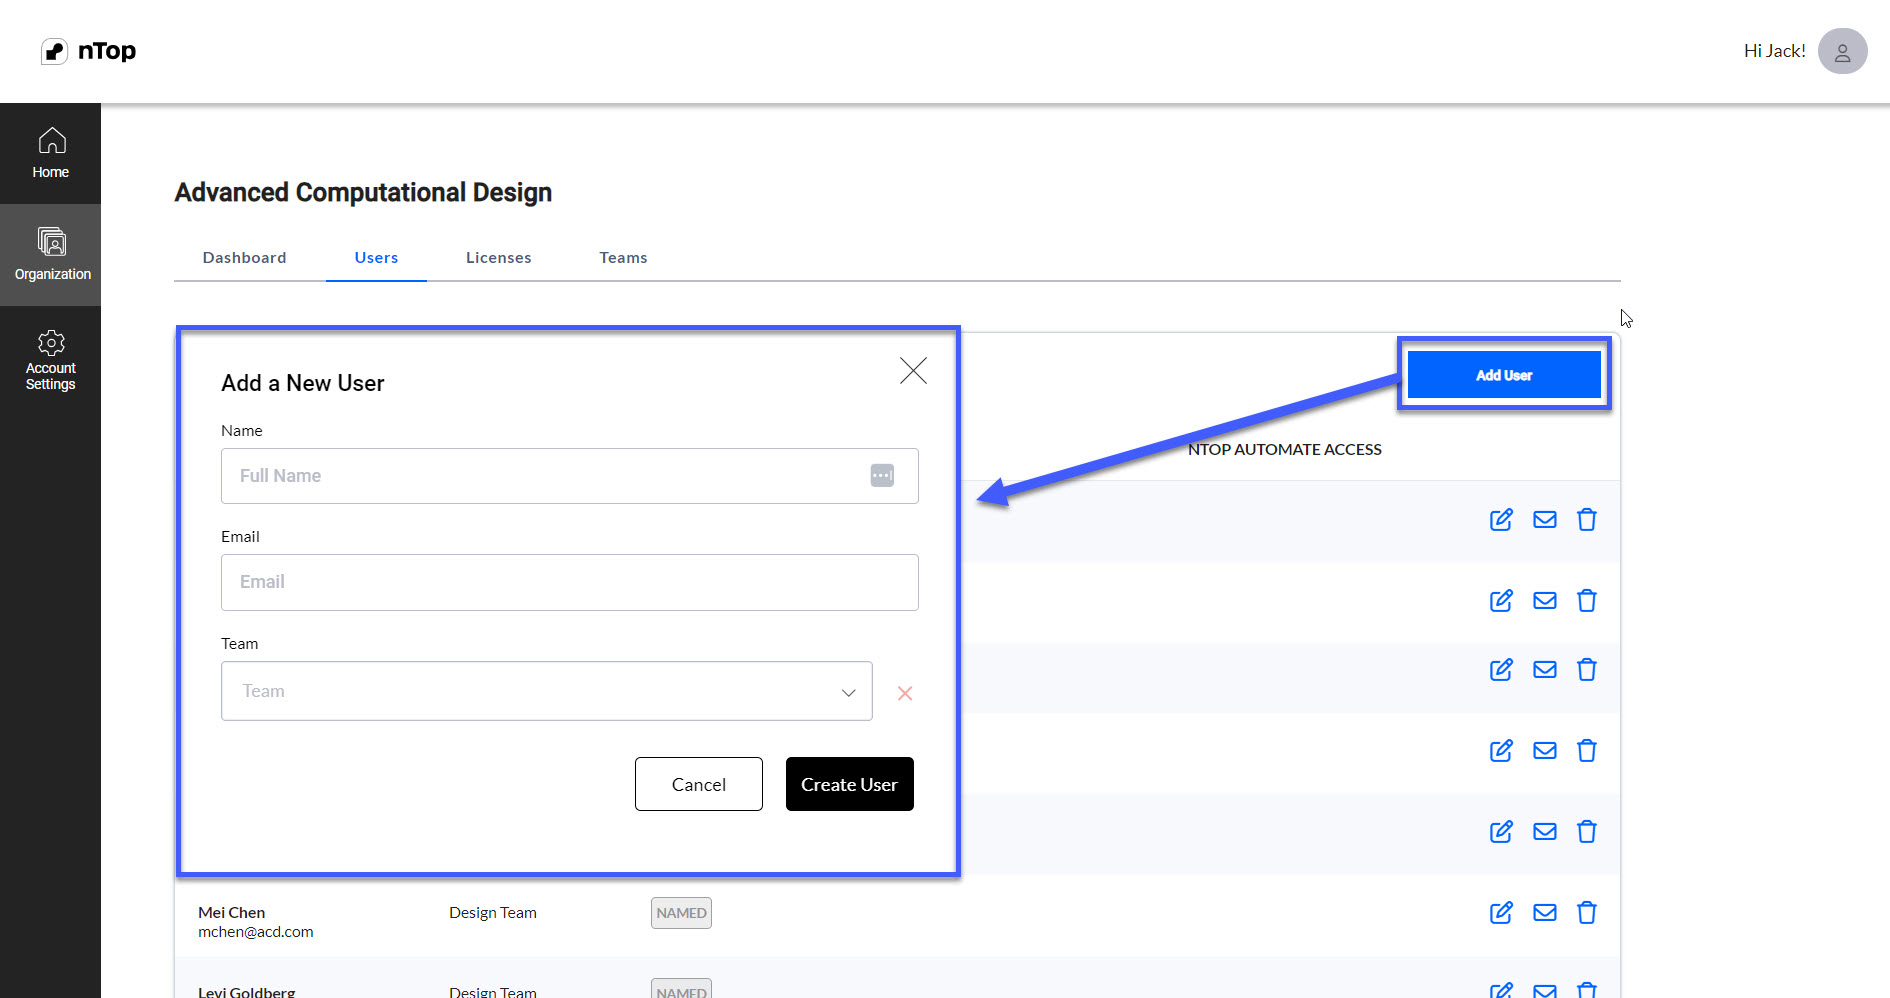
As an Org. Admin, you can invite new users to your organization. If there are users who already belong to your organization, they’ll automatically appear in the user table. You can add a new user to your organization by selecting the Add User button in the Userstab. The Add User button will open a modal window that’ll require you to input the following information:- Full Name
- Team (optional)
Managing Teams
As an Org. Admin, you can create teams to organize the users in your organization. You can also edit and delete teams. Teams can be used purely for organizing users, or you can use them to restrict license usage to specific users. To create a team, select the Add Team button in the Teams tab of your Org Admin Dashboard. A modal window will appear, allowing you to enter the new team name and select Create. If you need to change the name of a team, select the Edit icon next to the applicable team. This will activate the edit mode. Change the name of the target team and select Save. Below is an image of the Teamstab. Select the “trash can” icon next to the applicable team name to delete a team. You will be prompted with a message that asks you to confirm the deletion. Deleting a team doesn’t delete users or licenses. If you delete a team that users are assigned to, the users’ team will default to **None.**Hit cancel to exit this mode.
To add a user to a team, select the Edit icon in the row of the user table. You can choose a team from the Team drop-down menu from this modal window. You can also remove a user from their current team by clicking the red “x” next to the team drop-down box. Select Save when you are finished editing the user. Below is an image of the Edit User Details window when editing in theUser tab.
Select the “trash can” icon next to the applicable team name to delete a team. You will be prompted with a message that asks you to confirm the deletion. Deleting a team doesn’t delete users or licenses. If you delete a team that users are assigned to, the users’ team will default to **None.**Hit cancel to exit this mode.
To add a user to a team, select the Edit icon in the row of the user table. You can choose a team from the Team drop-down menu from this modal window. You can also remove a user from their current team by clicking the red “x” next to the team drop-down box. Select Save when you are finished editing the user. Below is an image of the Edit User Details window when editing in theUser tab.

Managing Licenses
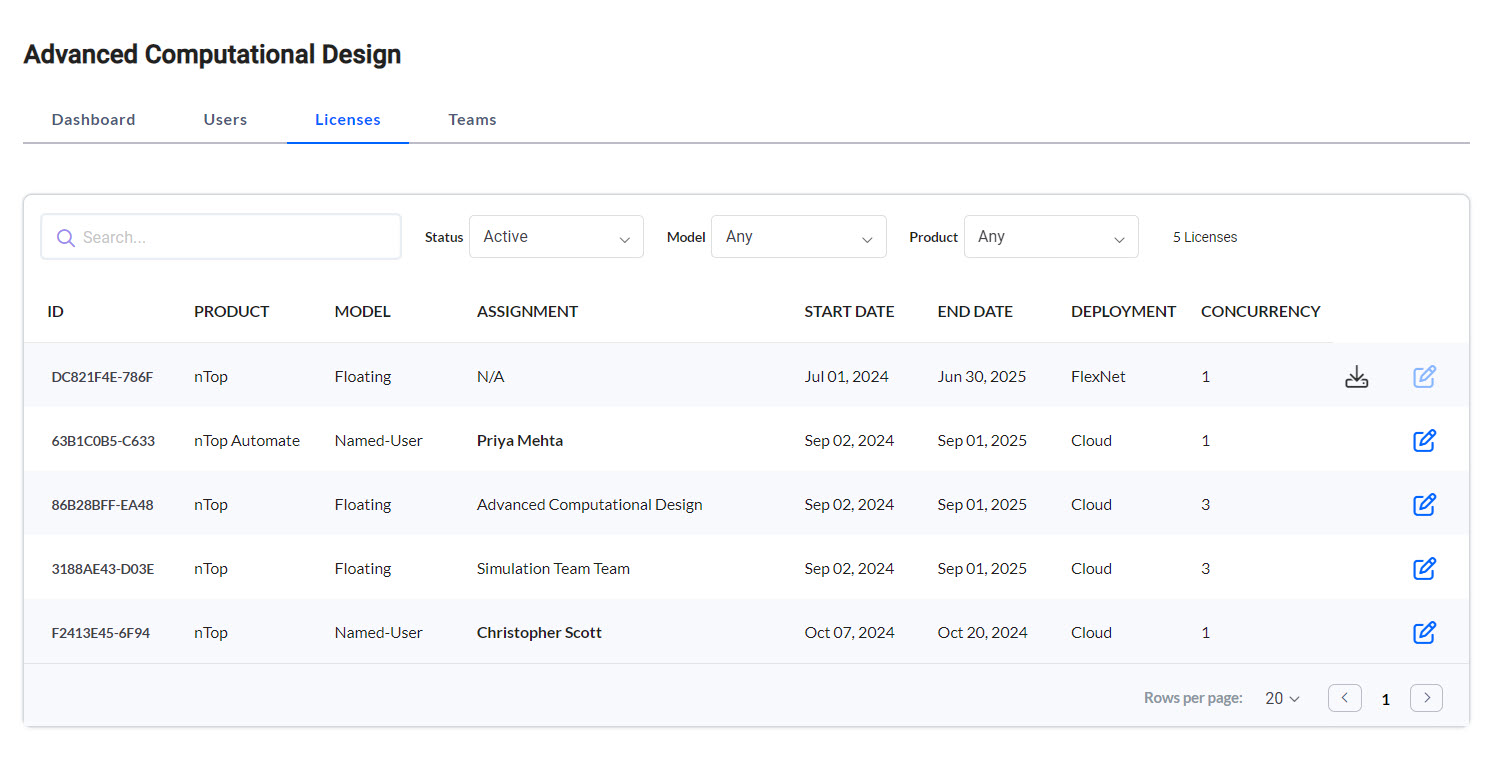
The Licenses tab shows an overview of your organization’s licenses. Below is an example of a License tab displaying different license options that nTop offers. The nTop Floating licenses will have the model Floating. You can filter them using the Model filter at the top of the table.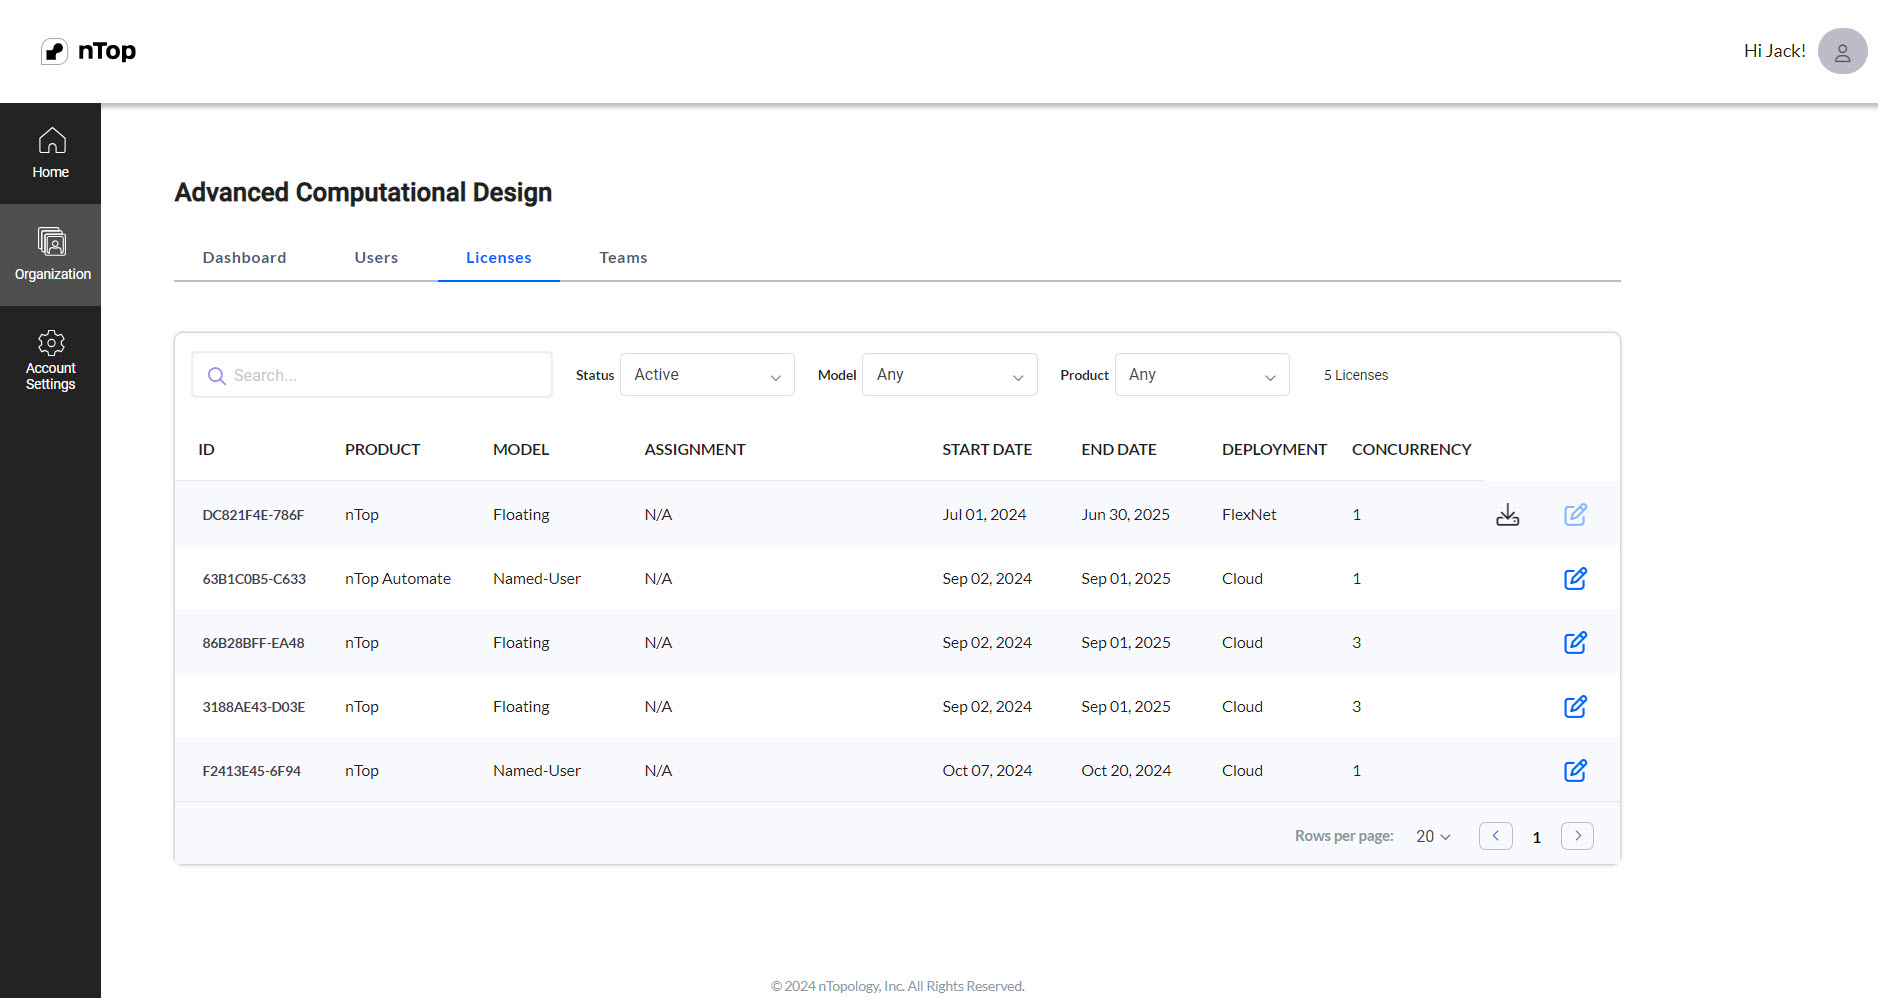 Select the edit button next to the applicable license to assign a Floating License to a group of users. This button opens a window that prompts you to assign the license to a team. You can choose to select a team from the drop-down menu. After making your selection, click the “Assign” button.
Assigning Floating License to an Organization
Check the box “Assign to the organization’s level.” This allows any user you have added to your organization to use this floating license, regardless of their assigned team. After making your selection, click the “Assign” button.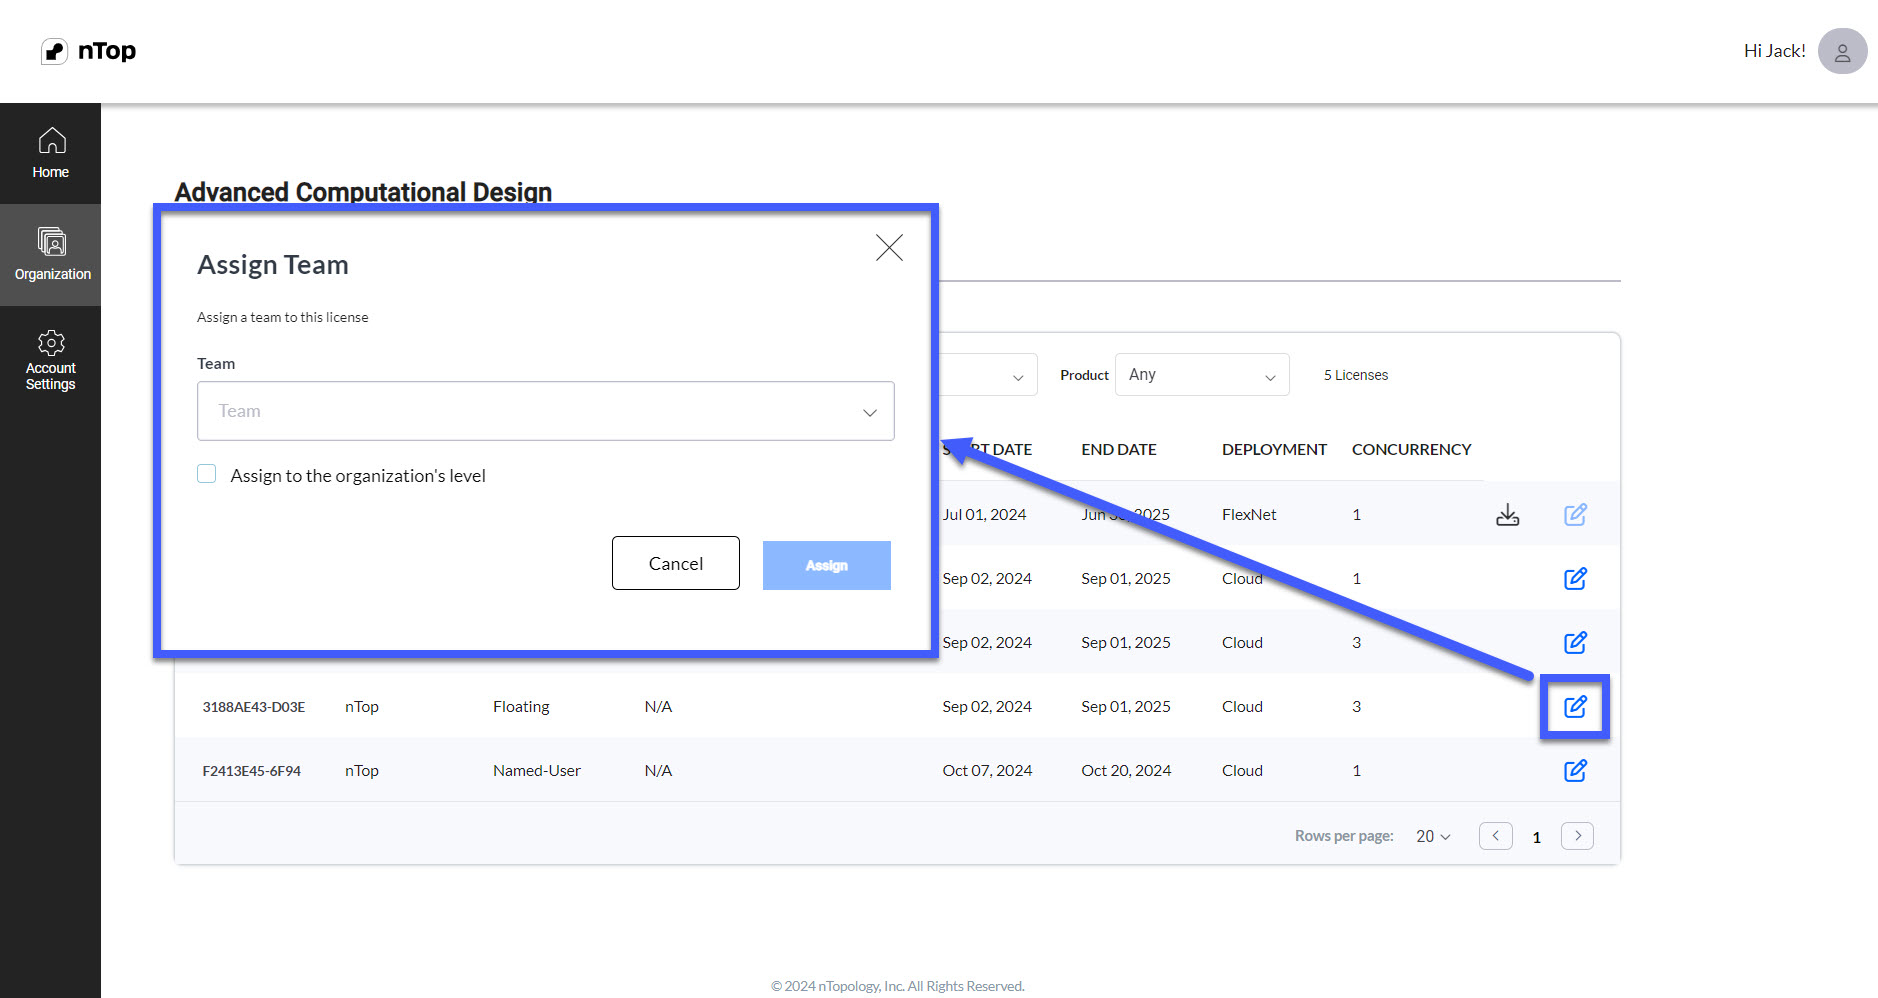
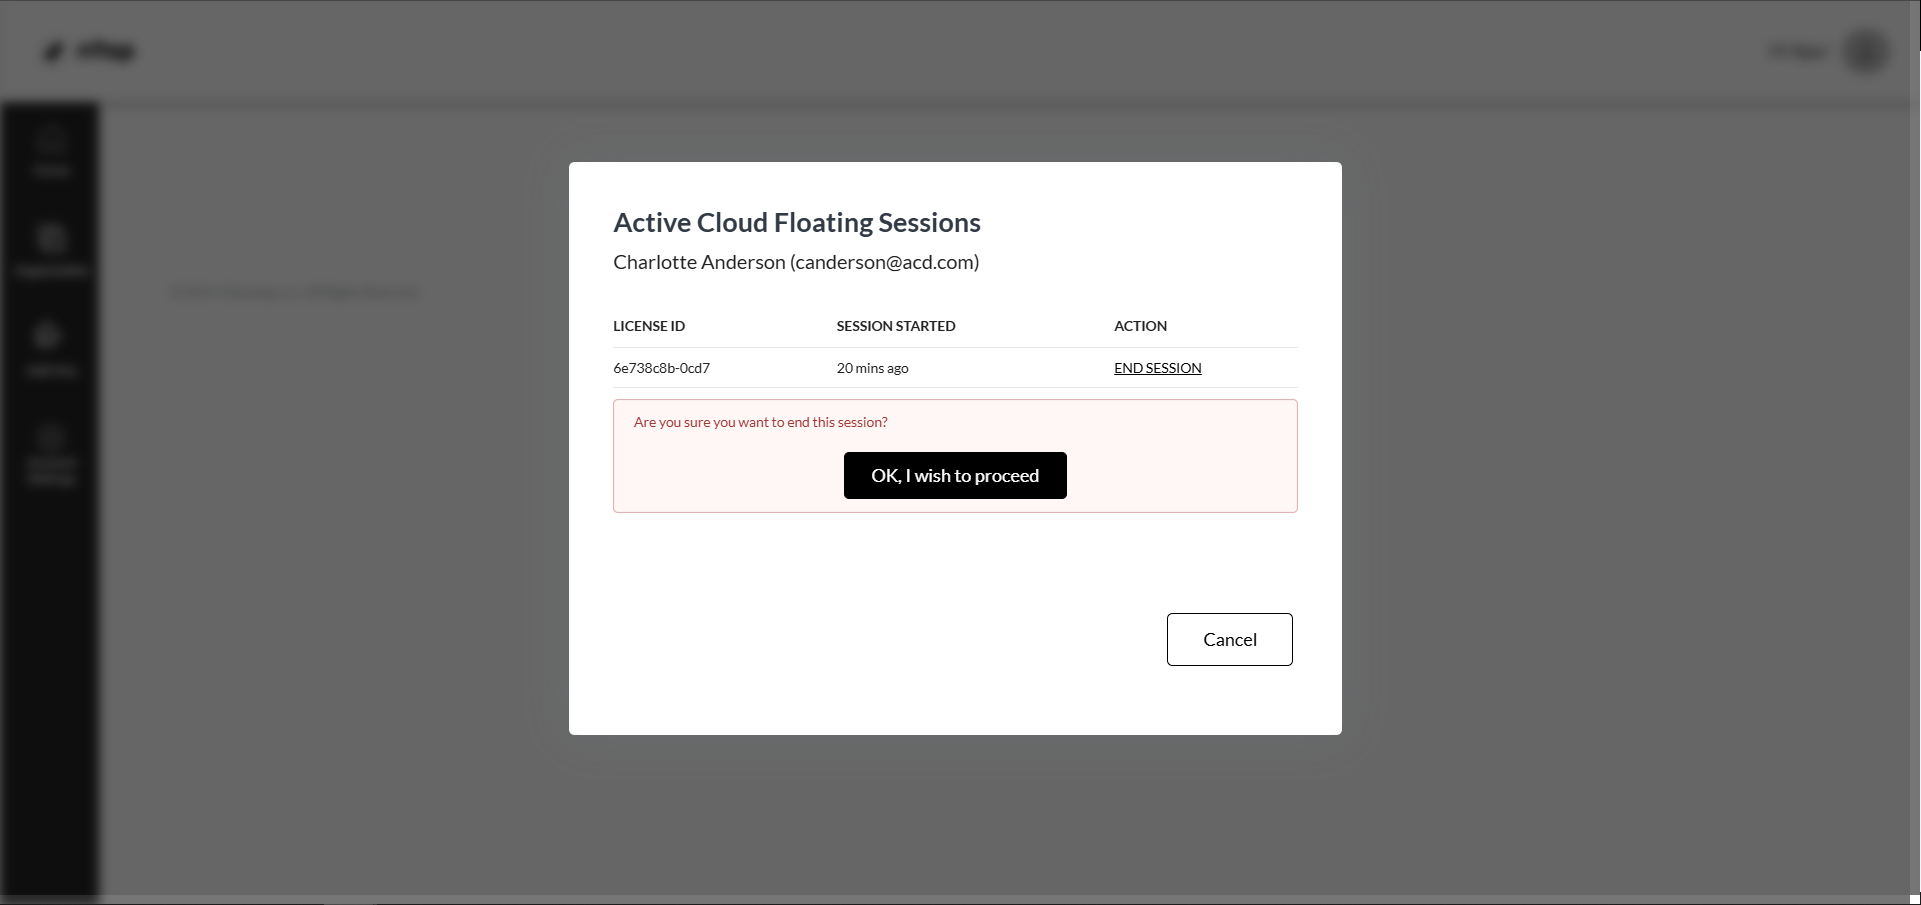
View Active Cloud Floating Sessions
You can view who has checked out the floating license by clicking on the End Sessions button; this will open up a modal with the User and Session information along with the End Session button for you to terminate the session and retrieve the Floating license.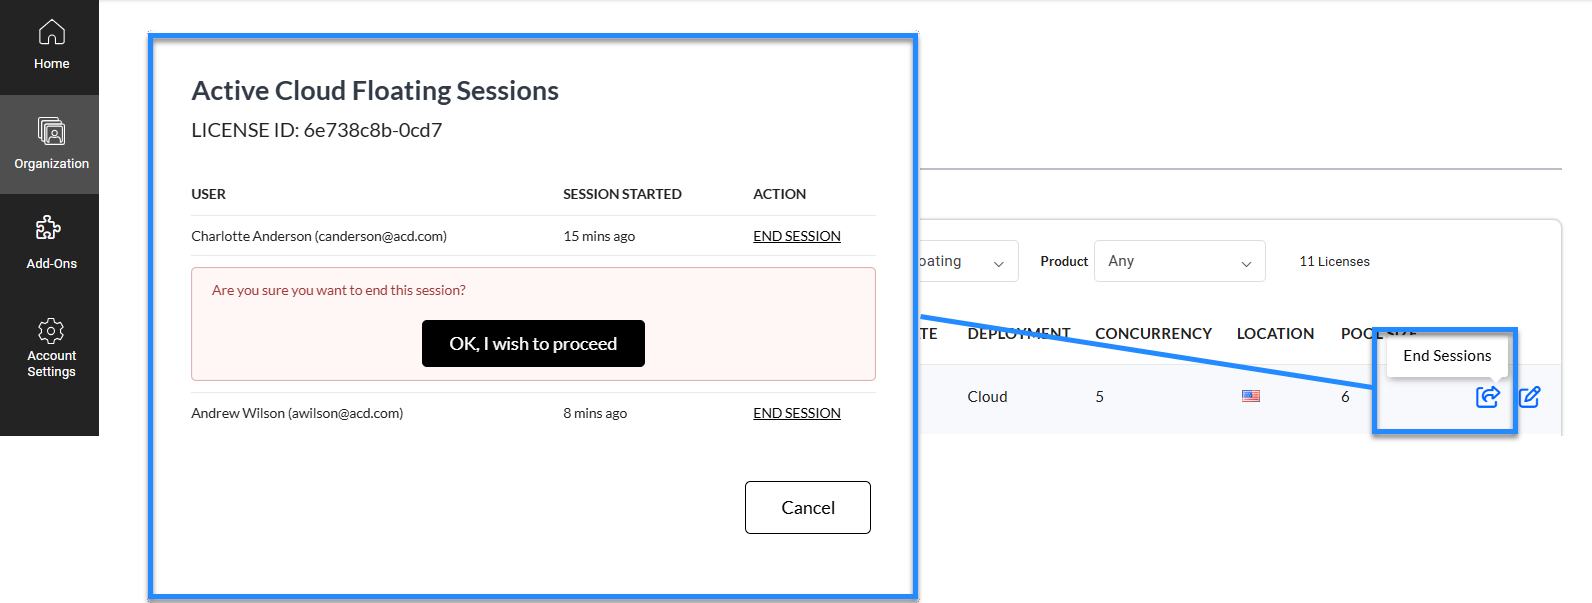
Note: You can also view these Active Cloud Floating Sessions on a user level in the Users tab.
License Organization Example
The following is an example of how assigning a license to a team works. In the image below, you can see that this organization has three separate teams. The Design team has no licenses available, the ML team has one user with a nTop Named-User License, and the Simulation Team has 1 Floating License and one nTop Automate Named-User License.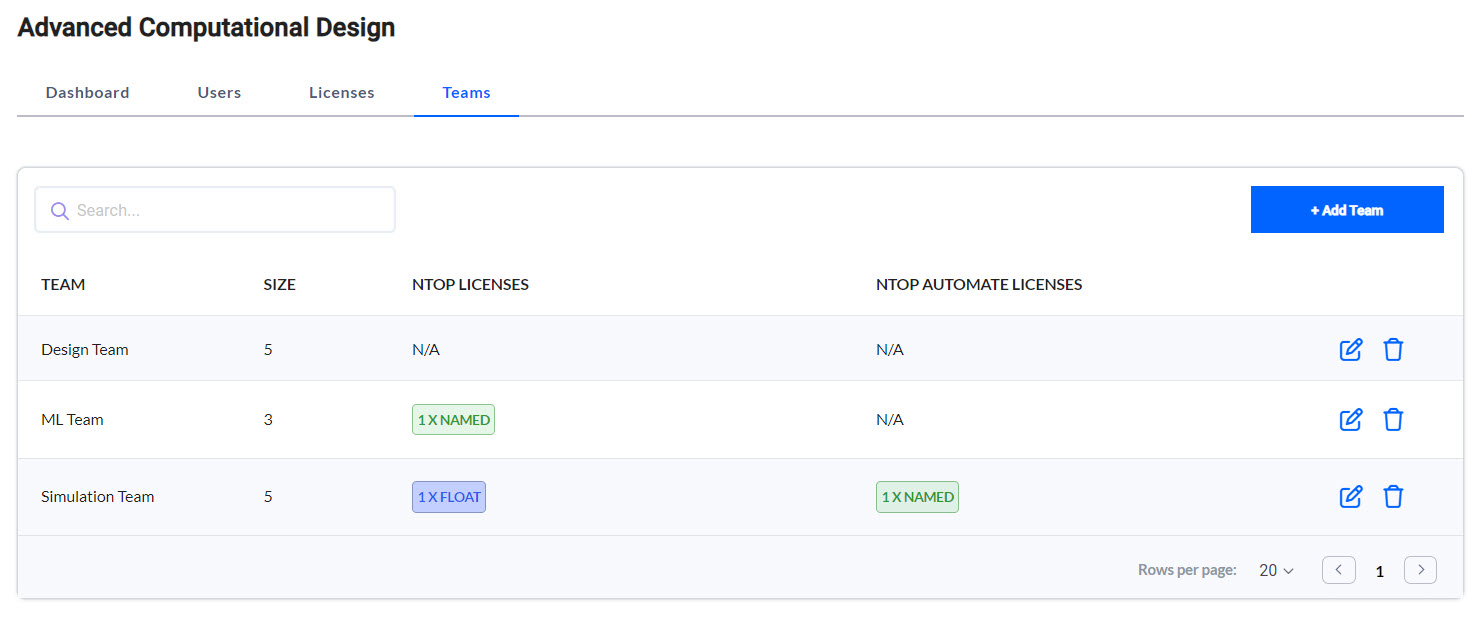 If we go to our licenses tab, we can see the following licenses available:
 From the Teams and Licenses tabs, we can conclude the following for how the users in the organization can use the licenses:
- The FlexNet License is unassigned as it runs separately on FlexNet Servers.
- Priya Mehta is the only user who has access to the nTop Automate Named-User license.
- The first Floating License is available to the entire organization and has a concurrency of 3. This means that up to 3 users can be using it simultaneously.
- The second Floating License is only available to the Simulation Team members and has a concurrency of 3. So three Simulation team members could have it checked out at the same time.
- Christopher Scott is the only user who has access to the nTop Named-User License