There are two ways of passing inputs for nTop Automate execution: directly in the command line or using a JSON file. While we recommend the latter for most cases, the first method can still be used for simple cases and helps to understand the basic elements of stringing together a command.
To see the menu of possible command arguments, simply type ntopclon the command line from any folder.
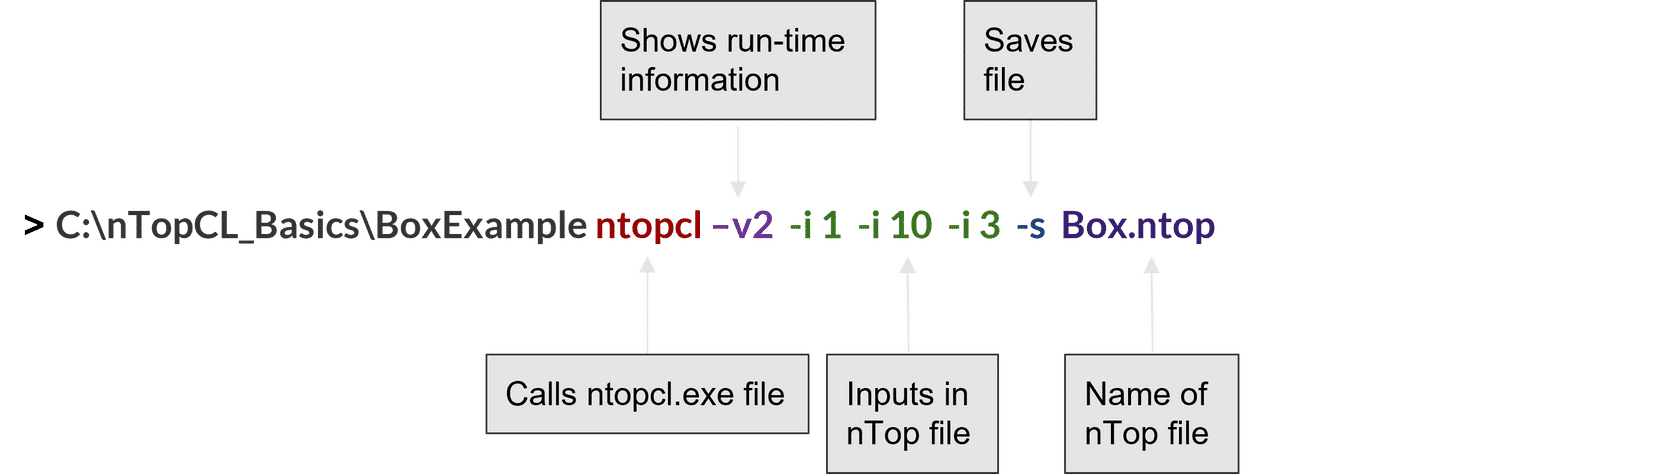
The first method is to enter the input variables directly into the command line and is therefore limited to only scalarand textinput types. This can be sufficient if you are working with a very simple Notebook.
Once in the correct directory, you can use the following command to execute an nTop Notebook in that folder with desired input variables:
When entering the input with the**-i** flag, you may need to add units if they are not already embedded into the Notebook’s input variables. The**-i** flag needs to be provided for each Notebook input in the order in which they appear in the Notebook.
The recommended method for more complex use is to work with a JSON file containing input values, which supports boolean, integer, scalar, text, file path, vector, point, and enum input types. You can find more information on each specific type under Documentation → Using nTopCL → Input.
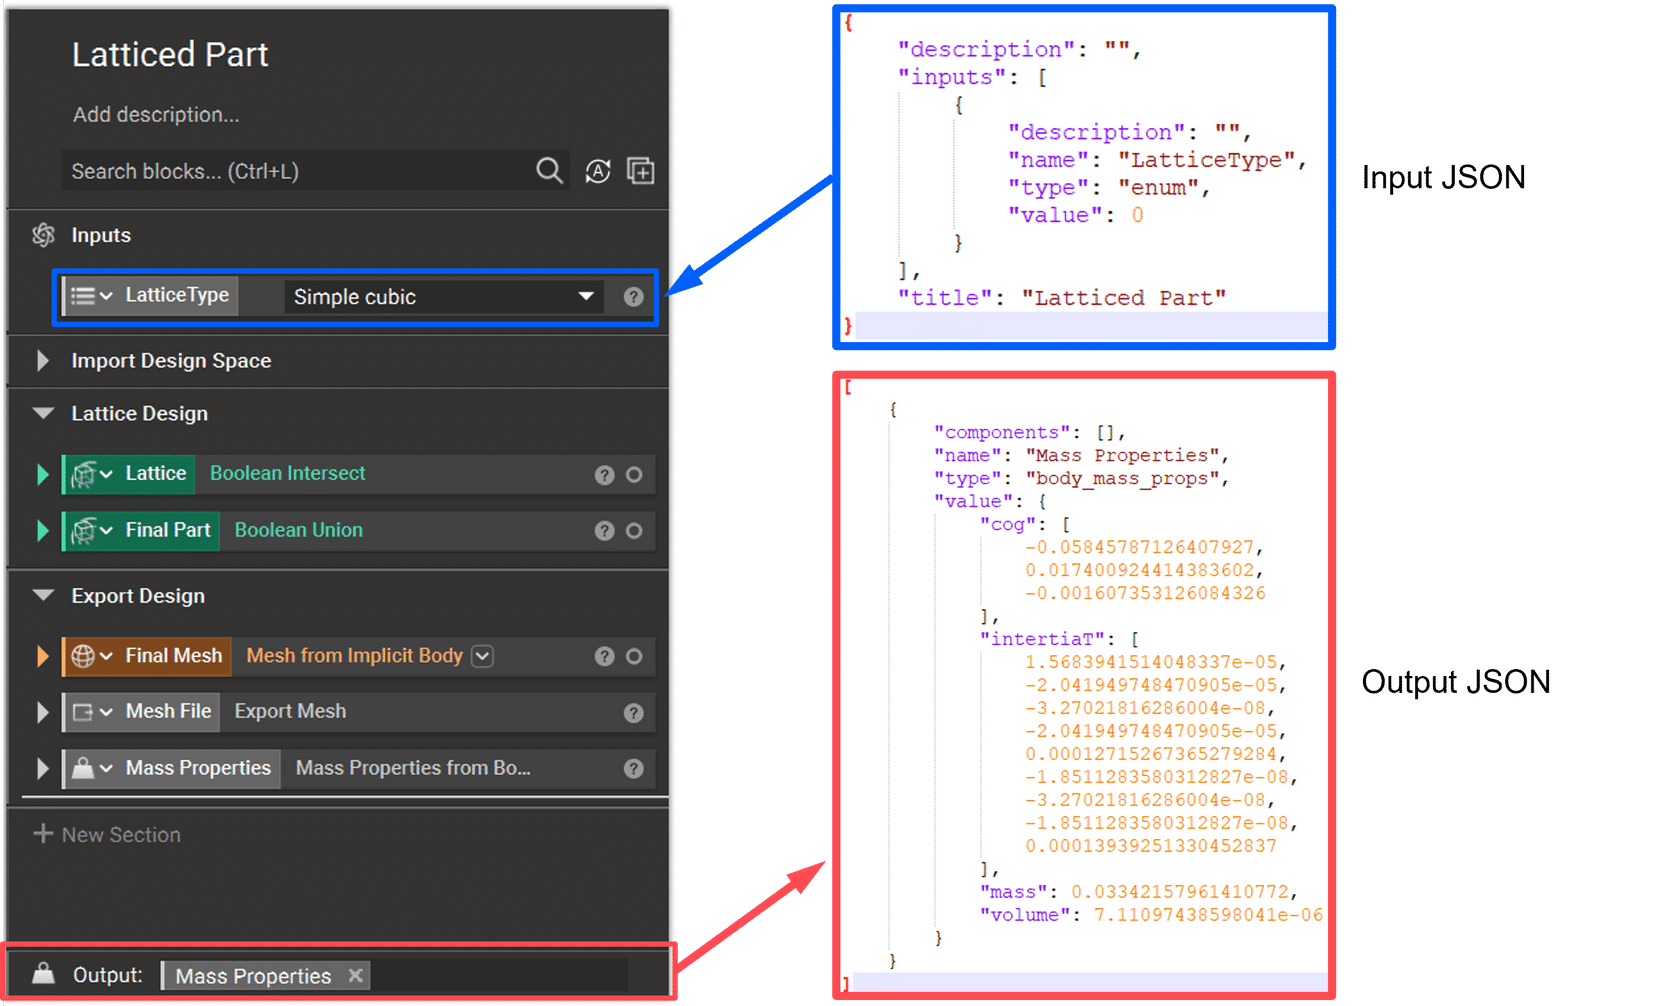
You can write all your input variables in a single JSON file. The template for this can be automatically generated in the command line using the -t flag with the ntopcl call, which will place one input and one output JSON template file in your directory.
The files will contain the current input and output values in your Notebook. You can keep modifying the values in the input template and run nTopCL each time with the JSON file as input, or keep a separate JSON file for each run.
With the example above, only one input value of 0 appears on the template based on what is currently in the input of the Notebook, Simple cubic, the first item in the drop-down enum type list with a starting index of 0.
If you, for instance, want to run nTop Automate with multiple LatticeType values, change “value” to “values” and 0 to a list of index values for each desired lattice type. Using the list [0, 2, 5, 6] in this case would mean having Simple cubic, Face centered cubic, Diamond, and Fluorite as inputs.
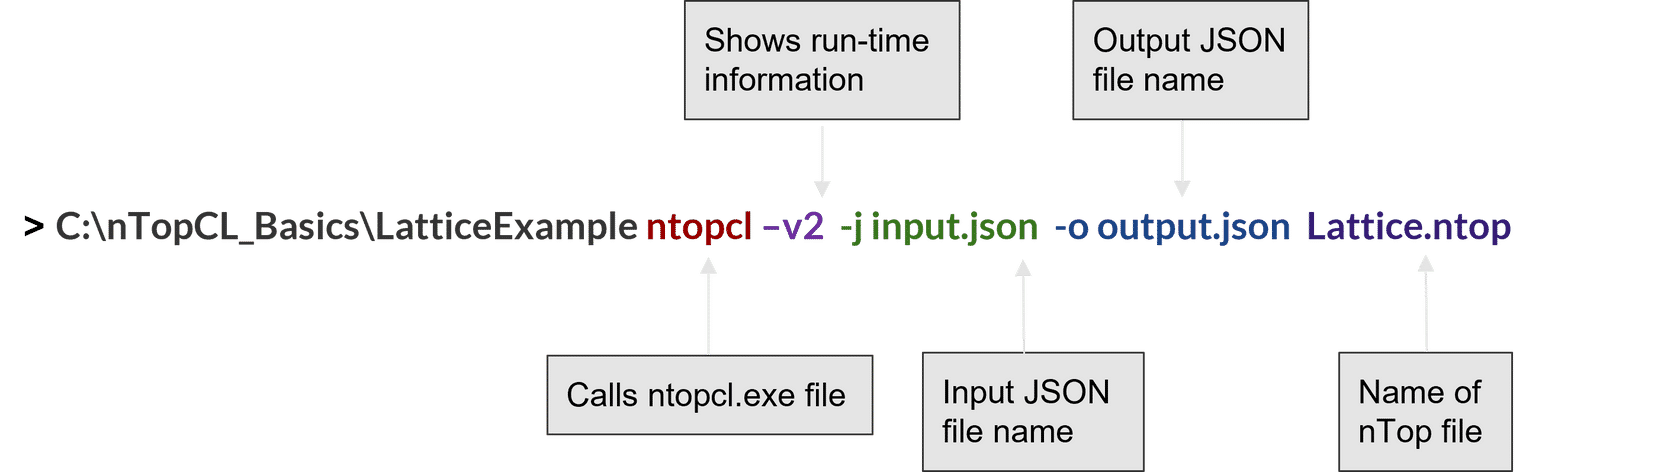
After changing the input values in your template file and saving it, you can run nTopCL using this command:
The flags for input and output JSON files are -j and -o respectively. The input file should match the one you saved and you can name the output file that will be created and placed in the directory in this command.
You also have the option to add the**-p** flag to your command. The output file generated will then additionally include data about the properties of the output variable.
Tip:
Shift + Right-click in your working directory folder and choose “Open Powershell window here” to access the command line without changing the directory.
Running a command with ntop instead of ntopcl opens up the GUI so that you can see the Notebook with the given inputs. Use the first to check if your workflow works properly and as intended.
Adding -s will save the Notebook and overwrite the existing one.
The default verbosity level, which defines how much information you get about the execution as printed messages on the command line screen, is 1 (shows errors and warnings). Add -v2 to your command to change this to level 2 (shows errors, warnings, and run-time information) to see more detailed information. This can be helpful to see which part of the Notebook is causing the issue. To get these messages as a text file, add –logfile LogFile.txt to the command.