Objective:
Learn how to create multiple lattice designs at the same time with lists.Procedure:
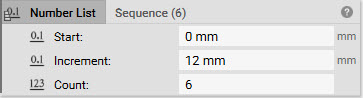
1. Create a list of numbers.- Add a Sequence block. This block creates a list of numbers that increment by a constant amount.
- Start: 0 mm
- Increment: 12 mm
- Count: 6
 2. Create an array of points.
- Add a Point List block
- Insert the Sequence block into the X input of the Point List. This creates a point at each spot specified in the sequence.
- Add a Box block
- Insert the Point List block into the Center Point input. This creates an object at each point.
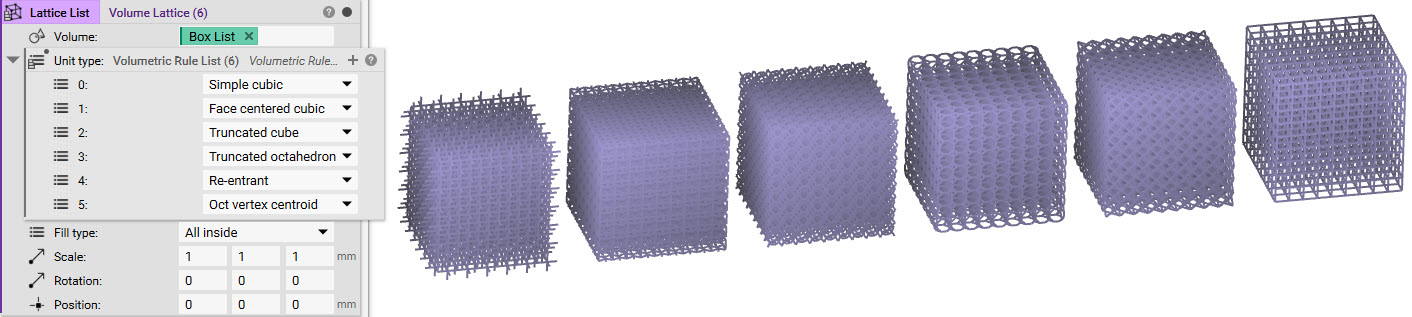
 4. Fill the boxes with a lattice.
- Add a Volume Lattice block
- Insert the Box List into the Volume input. By default, this fills each box with the same lattice. In order to fill each box with a different lattice, we need to use the Volumetric Rule List block and select six lattices.
- Insert a Volumetric Rule List into the Unit type input. Choose 6 different lattices to iterate the box design
 And that’s it! You’ve successfully created multiple lattices on your design using lists.
Are you still having issues? Contact the support team, and we’ll be happy to help!
And that’s it! You’ve successfully created multiple lattices on your design using lists.
Are you still having issues? Contact the support team, and we’ll be happy to help!