Objective:
Learn how to create a Periodic Lattice and use Unit Cells and Cell Maps.Applies to:
- Lightweighting
Procedure:
The Periodic Lattice is a building block for all periodic lattices. It accepts all Unit Cells and Cell Maps. The parameters update based on which Unit Cell is chosen.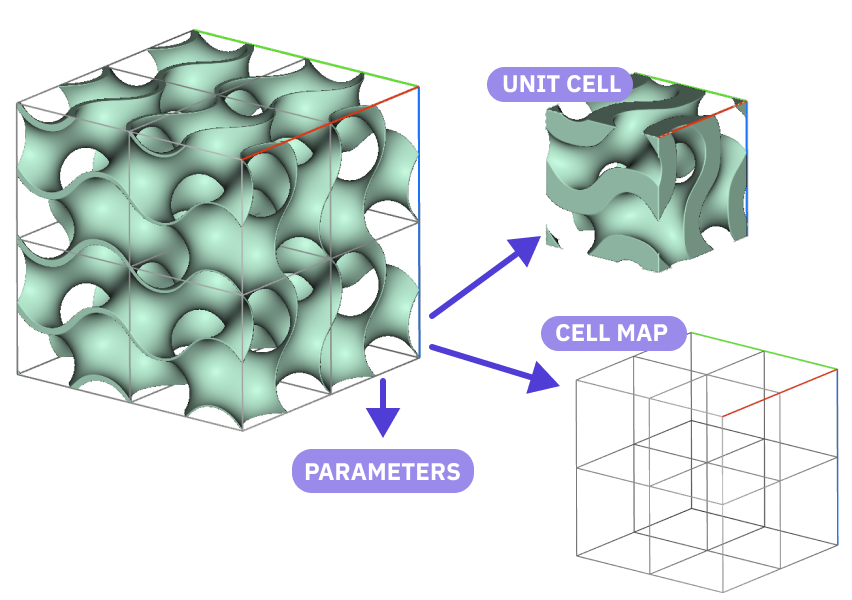 1. Choose your Unit Cell
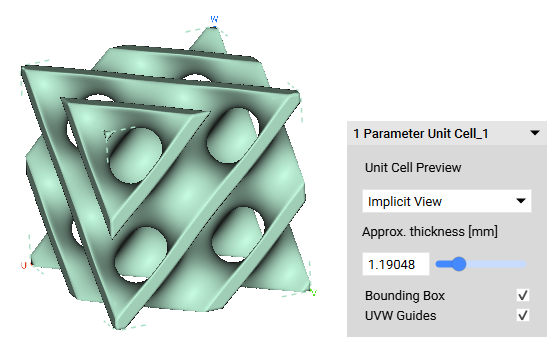
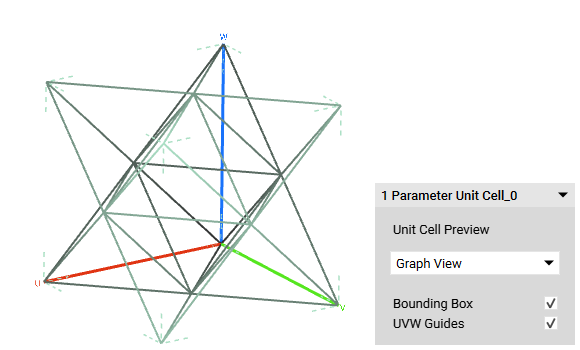
There are several options for Unit Cells. These include Graph, TPMS, or Custom.
1. Choose your Unit Cell
There are several options for Unit Cells. These include Graph, TPMS, or Custom.
-
- When selecting your cell type, a Unit Cell Preview pops up. You can toggle between Implicit View and Graph View, preview the relative thickness, and toggle the bounding box on or off. The relative thickness is just a preview of what that value would look like, it doesn’t set the thickness.
 2. Choose your Cell Map
The Cell Map is the next building block in the process. It is created independently from the Unit Cell. Its purpose is to create the layout of the Unit Cells.
There are two main types of Cell Maps: Geometric and Face/Mesh Dependent. Check out all of the Cell Maps within the Lattice tab in the Ribbon.
2. Choose your Cell Map
The Cell Map is the next building block in the process. It is created independently from the Unit Cell. Its purpose is to create the layout of the Unit Cells.
There are two main types of Cell Maps: Geometric and Face/Mesh Dependent. Check out all of the Cell Maps within the Lattice tab in the Ribbon.
-
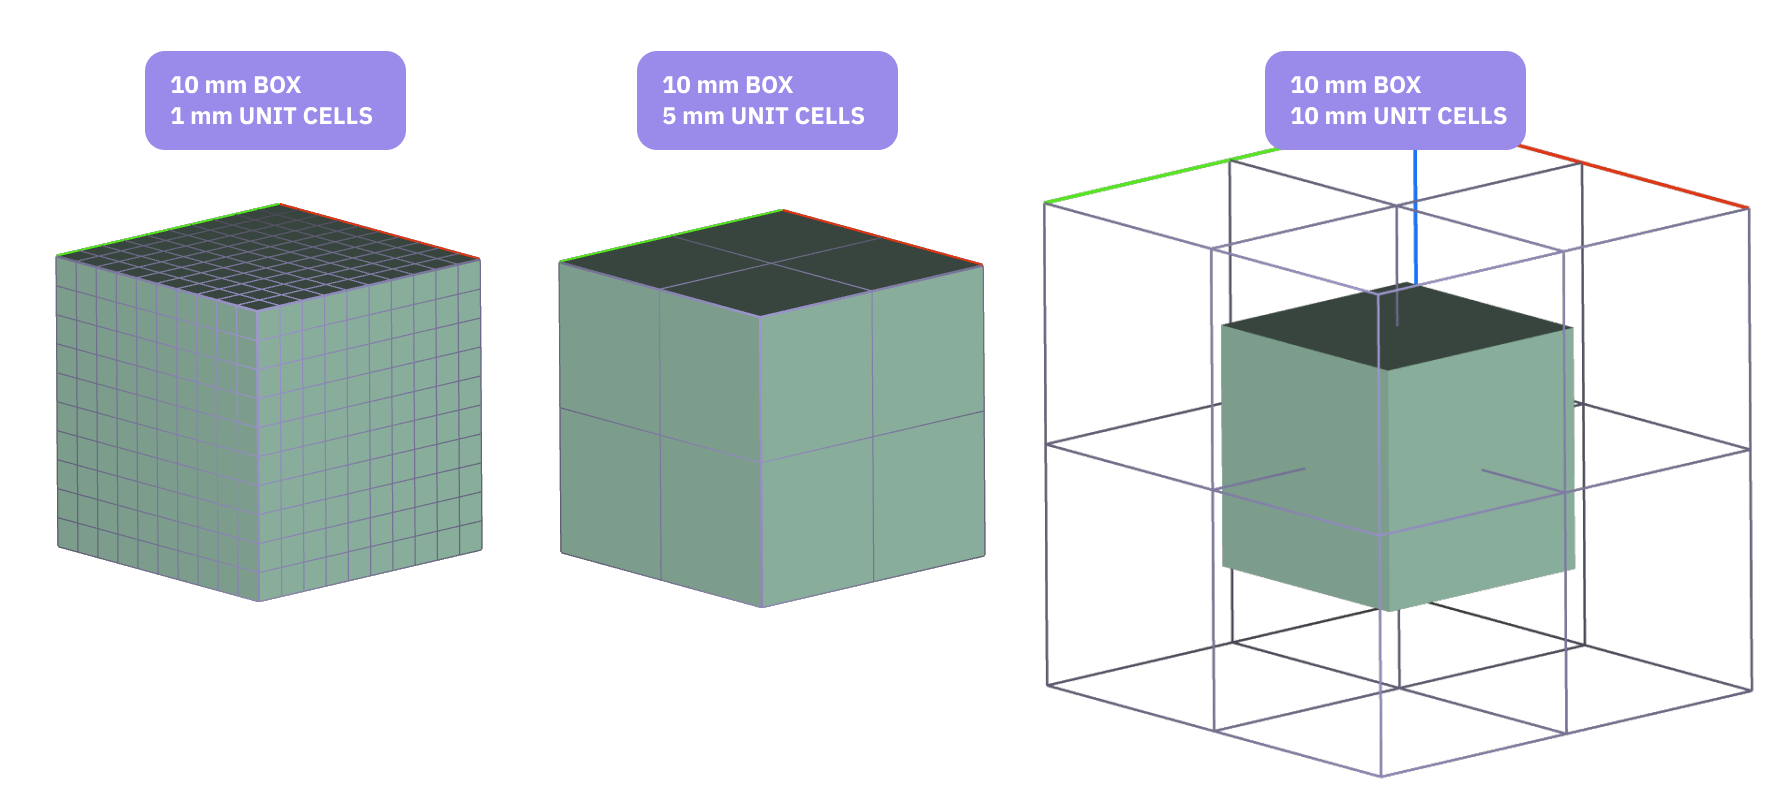
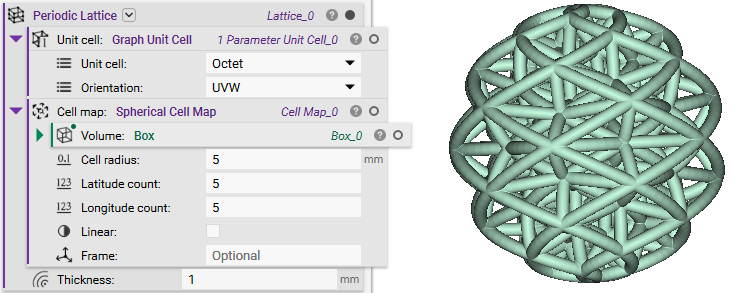
- The Geometric Cell Maps allow you to edit the size, radius, and cell counts. Each map has a Volume input that defines its extent and an optional Frame input to edit the starting point and the orientation of the map.
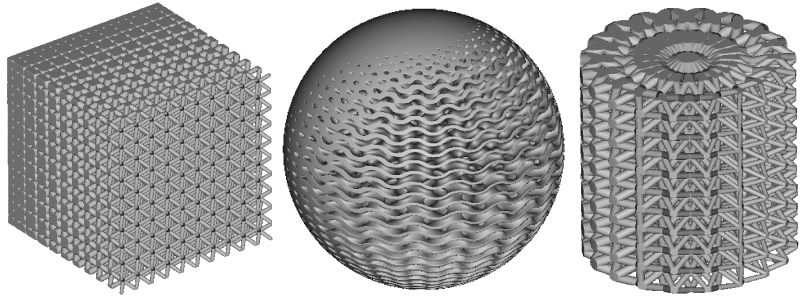
- The Volume input uses an Implicit body. The Cell Map tries to fit the Unit Cells within the volume depending on the size of the Unit Cells. See the figure below as an example of when the Unit Cells are larger than the volume.
- If you need a precise fit with larger Unit Cells, use the Trim Lattice block once you’ve completed your Periodic Lattice.
- If you want to trim the Cell Map itself, without creating cut off Unit Cells, use the Trim Cell Map block.
- The Volume input uses an Implicit body. The Cell Map tries to fit the Unit Cells within the volume depending on the size of the Unit Cells. See the figure below as an example of when the Unit Cells are larger than the volume.
- The Geometric Cell Maps allow you to edit the size, radius, and cell counts. Each map has a Volume input that defines its extent and an optional Frame input to edit the starting point and the orientation of the map.
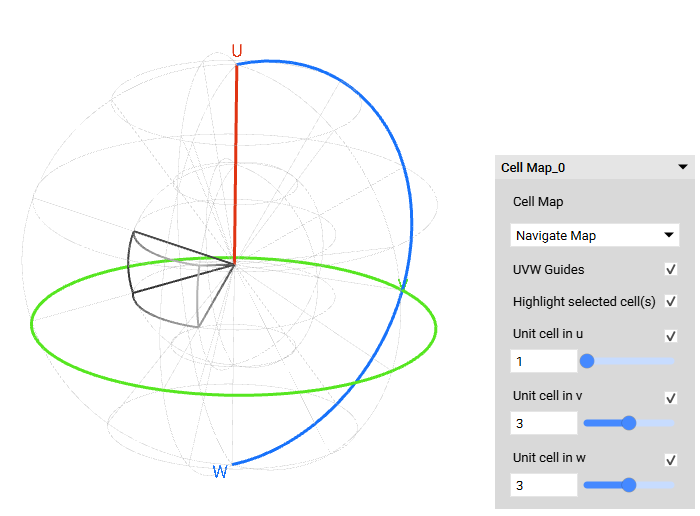
 When creating a Cell Map, you can view the Full map or Navigate the Map using the heads-up display (HUD). The navigate map allows you to take a closer look at each unit cell location.
 3. Build your Periodic Lattice
The Periodic Lattice is where you combine all of the elements and assign values to any parameters.
3. Build your Periodic Lattice
The Periodic Lattice is where you combine all of the elements and assign values to any parameters.
-
- Add a Periodic Lattice block.
- Insert the Unit Cell.
- Insert the Cell Map.
- Define any parameters.
- Add a Periodic Lattice block.
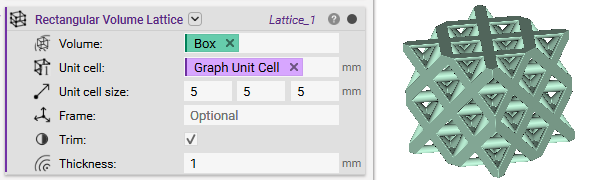
 If you don’t need to tweak the Cell Map too much, another method for creating lattices is to use the following blocks:
-
- Rectangular Volume Lattice
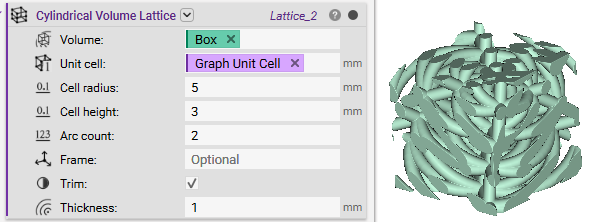
- Cylindrical Volume Lattice
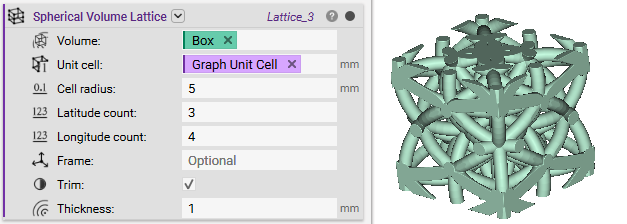
- Spherical Volume Lattice
- Rectangular Volume Lattice
 4. Using the Periodic Lattice in your workflow
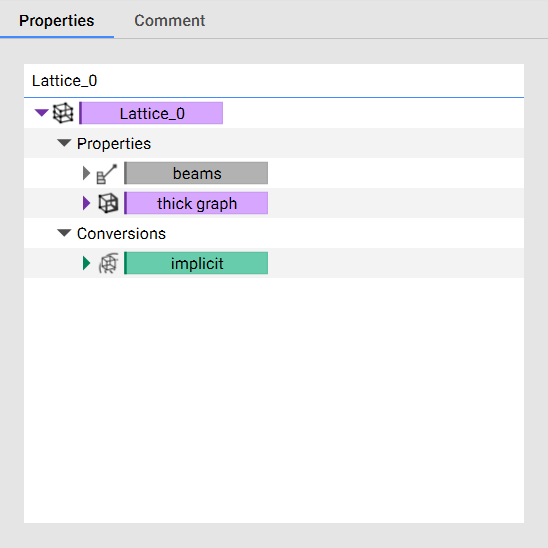
To use the Periodic Lattice body downstream, insert it directly into blocks that accept Implicit or Lattice types. The Periodic Lattice block contains implicit, thick graph, and beam properties. You can extract these by opening up the Properties panel and dragging the chips into the Notebook. You can read more about the new lattice data types here: Understanding the lattice data types.
4. Using the Periodic Lattice in your workflow
To use the Periodic Lattice body downstream, insert it directly into blocks that accept Implicit or Lattice types. The Periodic Lattice block contains implicit, thick graph, and beam properties. You can extract these by opening up the Properties panel and dragging the chips into the Notebook. You can read more about the new lattice data types here: Understanding the lattice data types.
 Are you still having issues? Contact the support team, and we’ll be happy to help!